For bloggers and content publishers, you already know by now that maintaining a regular content schedule is the key to having a successful blog. I should know. I’ve never been able to maintain a consistent schedule, which is why my blog traffic really sucks right now. This is where the content schedule becomes essential.
Download It
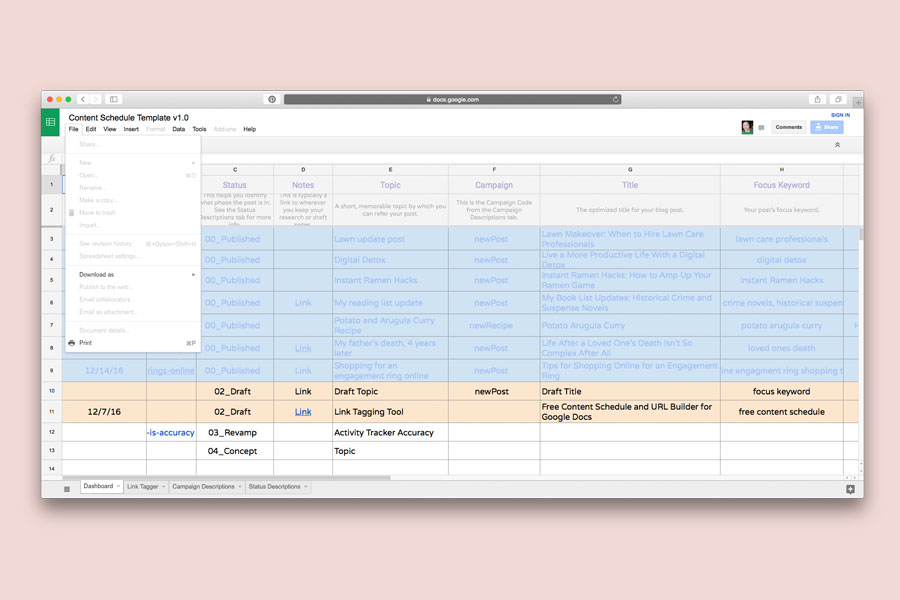
When you click on the download link, the content schedule template will open in a new window.
Download the Free Content Schedule for Google Sheets
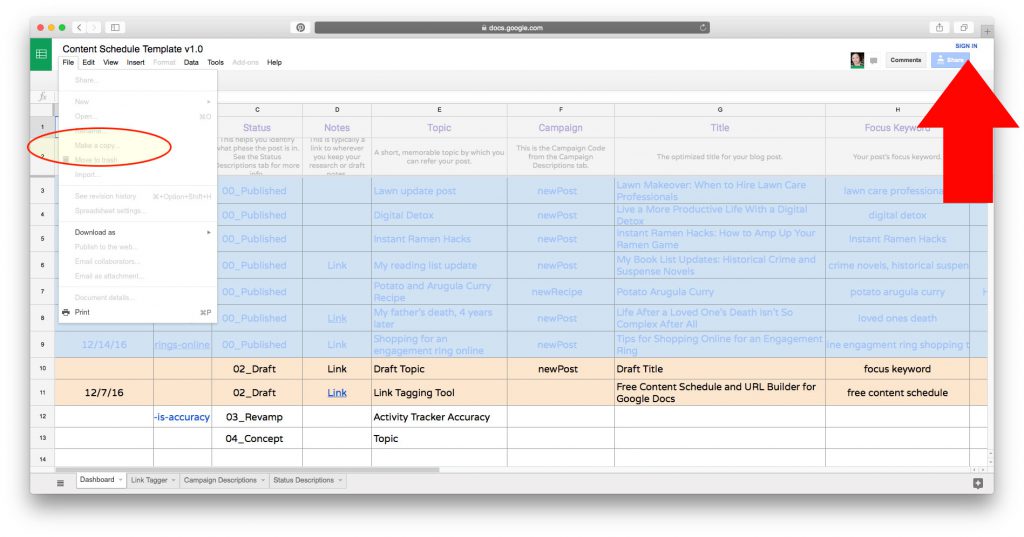
You’ll have to make a copy of it into your own Google Drive account in order to start using it. To do that, you’ll need to sign into your Google account as indicated by the red arrow in the screenshot. Once you’ve logged in, you should be able to fully access the File menu on the left. Make a Copy of the template into your own Google Drive and you’re ready to start working!
What Is a Content Schedule?
A content schedule, or sometimes also known as a content calendar or publishing calendar, is a calendar that helps you manage your publishing efforts in a timely manner.
There are multiple ways to develop a content schedule. Content schedules can live in spreadsheets, some in databases. Sometimes just a simple paper calendar with a few notes jotted down on it can be effective. It all depends on your needs and how you like to work.
Me? I like to work in spreadsheets because I’m a spreadsheet nerd. Plus spreadsheets can do a lot of cool things like calculate numbers and concatenate (one of my favorite words) stuff to automatically generate a desired output.
Why I Use Google Docs for a Content Schedule?
For me it was a personal preference. I’m an avid Gmail and Google Docs user. I also use iCloud and Dropbox as well. However, because I wanted something that a larger audience could use, I figured Google Docs would be better just because I assume almost everyone has a Google account.
So making this accessible to a wider audience was one goal. Making this accessible from any device with an Internet connection was another goal.
You can typically edit any Word or Spreadsheet doc from any device. Google has apps for both Android and iOS. And although one wouldn’t really want to copy and paste URLs into spreadsheets on their smartphones, this setup at least makes it possible in a pinch.
How do I use it?
Here’s an overview of how the content schedule is laid out. The Dashboard tab is basically where all your blog ideas get tracked and turned into content. As you get an idea for a blog post, you log it into this tab and fill in as much information as you can.
Below is a table with a description for each column of information.
| Column Name | Description |
| Publish Deadline | Date that the post is set to be published. |
| Link* | The live link or at least the permalink once it goes live. |
| Status | This helps you identify what phase the post is in. I’ve setup default statuses in the Status Description tab, but feel free to modify them. |
| Notes | This is typically Google Doc link where I keep my draft and research notes. I have a template for this document as well, which I may share at a later date. For now you can link this to your own Google Doc, or ignore this column for now. |
| Topic | A short memorable name by which you can call your post. |
| Campaign* | Each post should belong to a campaign. If you don’t want to get too granular with your campaigns, just use the default newPost campaign here. I’ve already built that into the template. |
| Title | The optimized title for the post. |
| Focus Keyword | The keyword you plan on optimizing your post for. This is especially useful if your blog is built in WordPress and you use the WordPress SEO plugin. |
| Category | The blog category that your post gets assigned to. |
| Video | Will there be a video for this post? Yes or No |
| Shoot Date | Date |
| Edit Deadline | This is the deadline for video editing. |
| YouTube Description | The description that you can copy and paste into the YouTube info page. |
| Publish Link | The live link for the video once it’s been published. |
(*) = Column names are required.
In my own workflow, I have 5 stages that a post goes through: Concept, Draft, Schedule, Publish, and Re-write. Not all posts have to go through the Re-write stage. That stage is for old posts that need to be refreshed and re-promoted.
Once your post has gone through the various workflow stages and is already published, it’s ready to be promoted. This is where tagging will track your promotion efforts.
To create your tagged URLs, copy and paste your published permalink into the Link column of the Dashboard. Make sure you have the appropriate campaign chosen in the Campaign column. Now click on the Link Tagger tab.
You’ll see some of the information carried over from the Dashboard already: Topic, Link, and Campaign.
You’ll need to fill out the remaining information such as Source, Medium, Content, and Term–basically the columns with a “-” (hyphen) in the cell.
Here’s a quick-and-dirty Google Analytics beginners lesson on campaign tracking (if you’re already a pro, you can skip to the next paragraph). Your Campaign, which we’ve already defined, is basically an overall marketing objective you’re working to achieve – from organic Instagram growth to increase in sales. The Source identifies where the traffic is coming from. The Medium is most often the marketing medium such as “banner”, “email”, or “cpc.” The Content helps you to differentiate between various ads (however, because I don’t do any paid advertising, I use this to identify the post content). The Term column is the paid keyword, but again if you’re only using this to track your organic social media efforts, you can skip this column.
Now you filled out all the proper columns, you can already see the generated URLs on the right. So to use a tagged url on Facebook for example, all you have to do is copy the generated URL under the Facebook column and go to another tab where you’re logged into your Facebook account. Then paste the URL in your status update. After a few seconds, the post will auto populate (as long as you’ve got all the proper open graph data implemented of course–but that’s another lesson).
I think at some point I’ll create a demo video on how to use this, but for now I’ll just leave as is. If you have any questions, post them here. Thanks!