A Peek Inside My Meditation Journal

After a long, long hiatus, I started meditating again recently. To assist me in my journey, I decided to start a meditation journal because as you also know, I like to document things. So what would incite this reawakening? I think one day I just woke up and realized I had a lot of inner turmoil and chaos in my head and in my heart. The anxiety that I had learned to tame through therapy began to inch its way back into my life little by little and I felt like I was sinking.

One of the things my old therapist taught me early in our sessions was self-care. My self-care regimen was comprised of 5 facets: spiritual, social, physical, mental, and emotional. Each day, I had to document one thing I accomplished in each of the 5 facets of self-care and the goal was to accomplish at least 3.

If you’re the type who likes to write, internally process, and reflect on things, a meditation journal may be the key to a rewarding meditation practice. Here are a tips for starting your meditation journal.

Do What Inspires You

This may be a very general statement but when it comes to journaling, do what inspires you. If you’re already familiar with keeping a journal, you know there are many formats you can follow for your own meditation journal.

However, many people believe when you’re trying to establish a new habit like meditation, keeping a journal that you’re inspired to write in will make it easier to keep up with.

Here are some ideas:

  • Dedicate a specific journal to your meditation practice
  • Draw inspirational quotes
  • Use double-sided tape to adhere inspirational photos
  • Decorate each page with stickers or washi tape
My meditation journal - a pocket Rhodia notebook
Here’s my meditation journal. It’s a pocket-sized Rhodia notebook with dot grid Clairfontane paper. This is my first Rhodia notebook and I must admit, I think they may be my favorite now.
Meditation journal pages
A peek inside. I decorate each page with a couple stickers and some washi tape just for some visual interest.

Paper Journal vs. Digital Journal

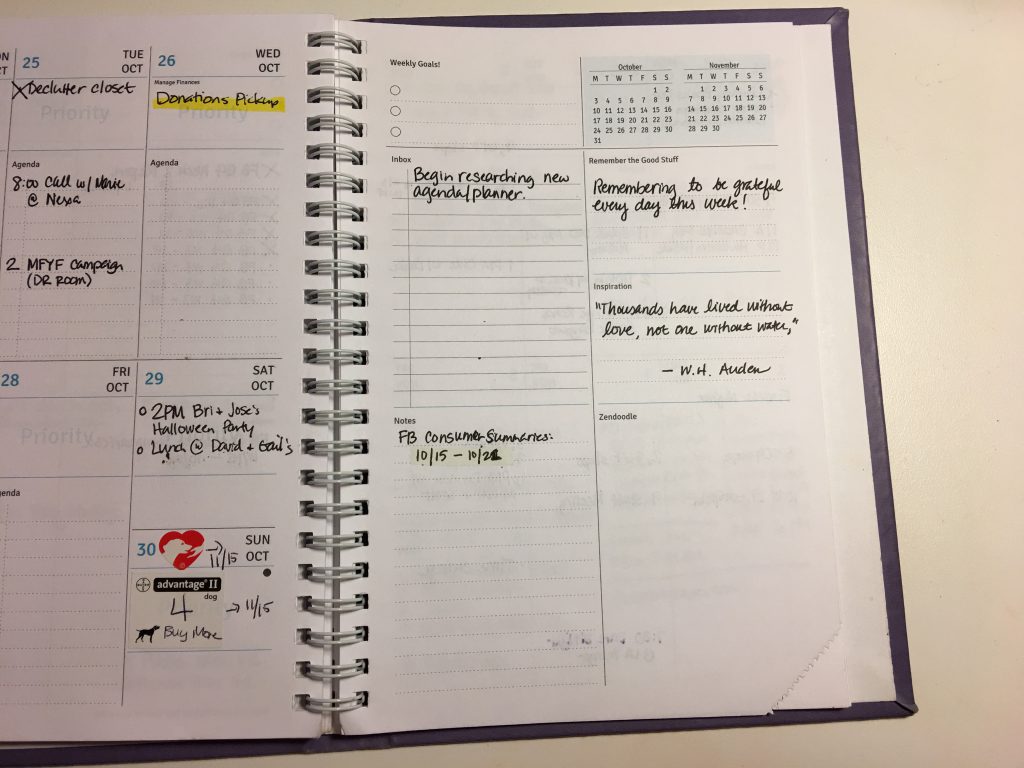
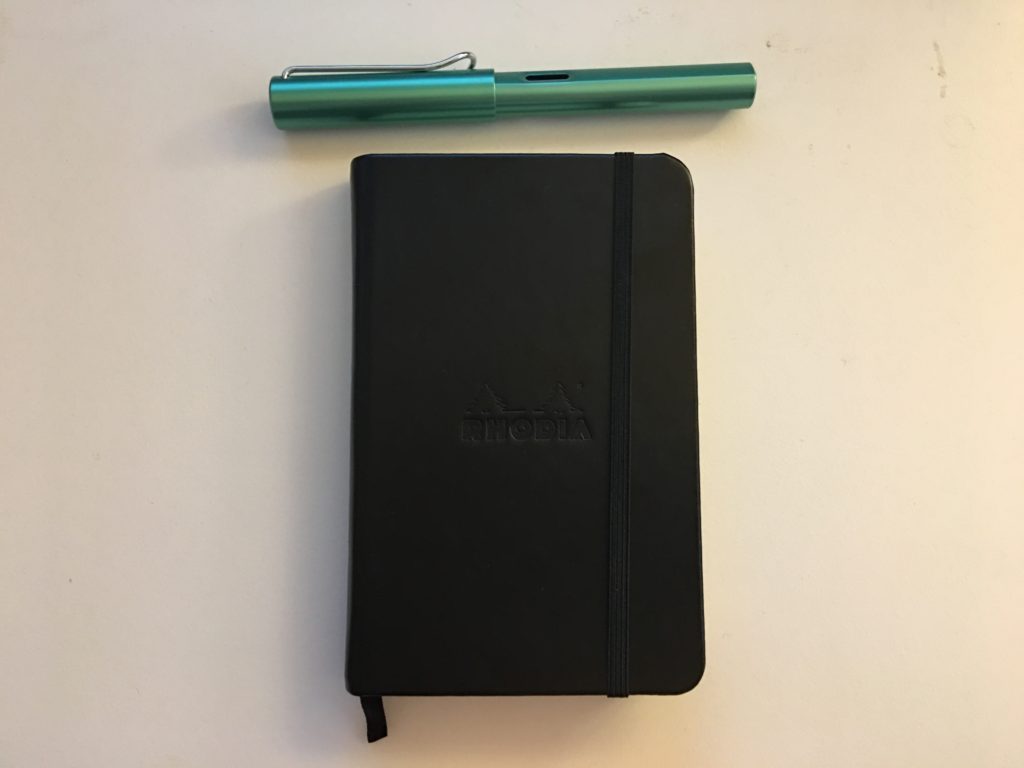
Sometimes the medium can be the make or break point of whether or not a new habit is successful. If you believe in the trusty ol’ pen and paper, then maybe a traditional journal like a Moleskine or a Rhodia notebook would be best.

However, if you’re the digital type, there are so many digital options out there for tracking your meditation practice. Just be sure that whatever app you choose enables you to track the things that are important to you and will make your meditation practice successful. And sometimes you may need to try both to determine which one is best for you. It’s ok to experiment.

Record What’s Important To You

What kind of progress do you want to track in your meditation journal? Do you want to track your time? Your sessions? Your emotions and thoughts during each session?

Determining what you want to track all depends on what’s important to you. A few things you may want to consider:

  • Length of session
  • Emotions felt during session
  • Level of focus
What I record
I have a chart where I keep some weekly stats. It’s not extensive, but it’s what’s important to me.

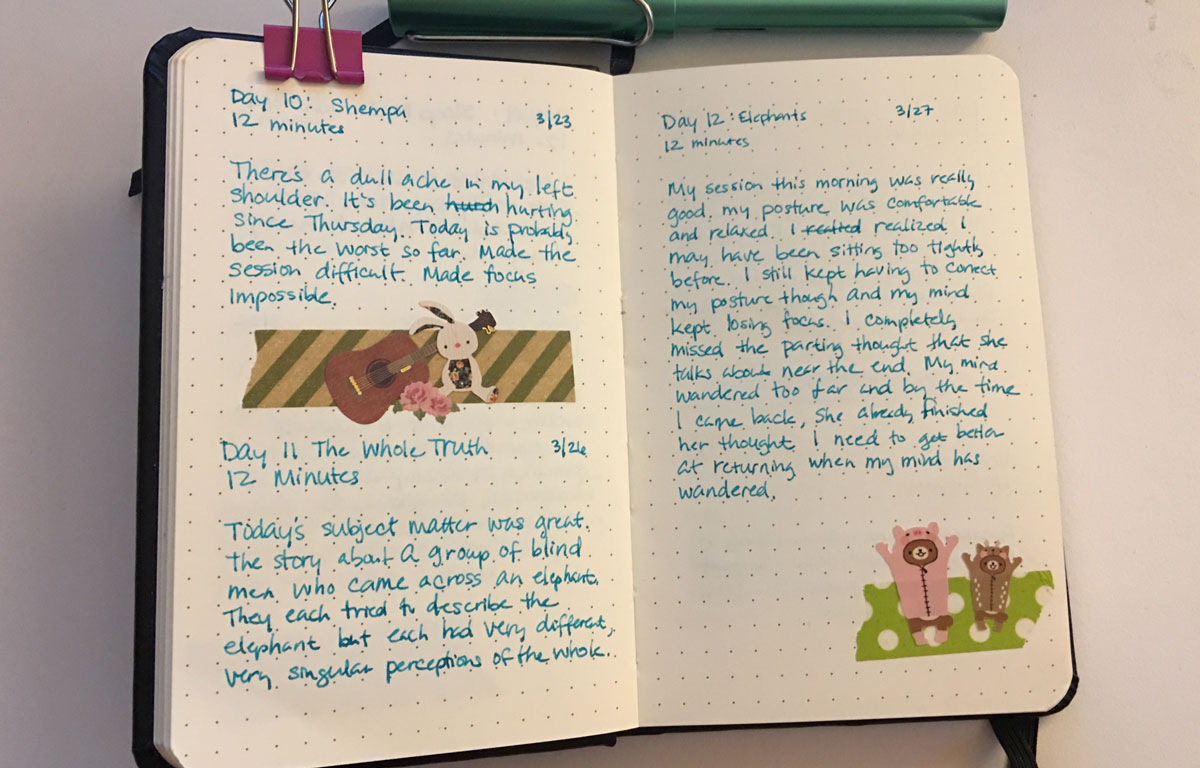
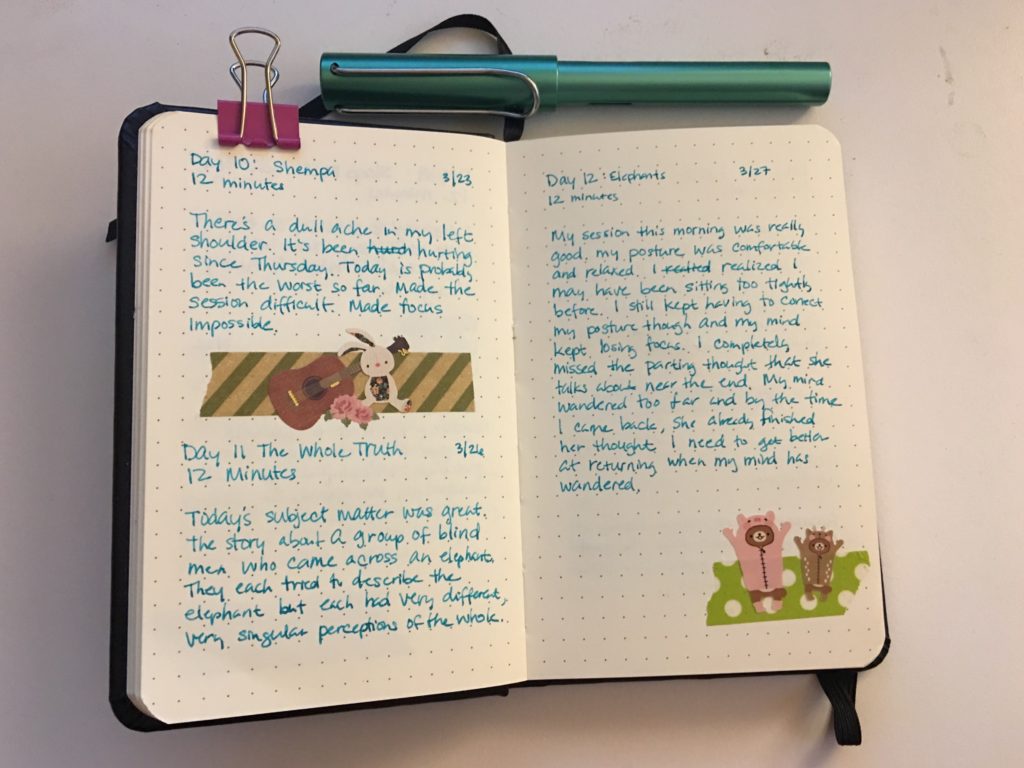
When I first started my journal, my entries were only 3 or 4 lines long. I noted my posture, how I felt, and the length of each session. Sometimes I would ruminate on why my session turned out the way it did. Like for example, two weeks ago I noted several times that I had several evening sessions, which was unusual for me. When I looked back at my entries, I could see what caused that and how it affected my sessions. Eventually I learned that I wasn’t getting enough sleep at night and I was rushing in the morning and often ran out of time for my morning session.

I was even noting the title of the guided meditation I listened to, but after a week or so, I realized that particular bit of information had very little impact on my ultimate goal.

That brings me to my next tip…

Don’t Be Afraid to Make Changes

Your meditation journal should be a living, breathing organism. It should grow and change with you. Like I mentioned earlier, sometimes you may realize you’re recording information that doesn’t make sense or isn’t as useful as you thought it would be.

Sometimes you may want to add things that, while they’re not necessary to your practice, are adjacent to your practice.

I got back into mixing my own incense blends so I dedicated a section of my meditation journal to my recipes and notes. I use incense during every session so for me it made sense to include this as a section of my journal.

Re-Read Your Meditation Journal and Learn From It

Over time, your meditation journal will become a stockroom of information. But what good would that information be if you didn’t review it every once in a while?

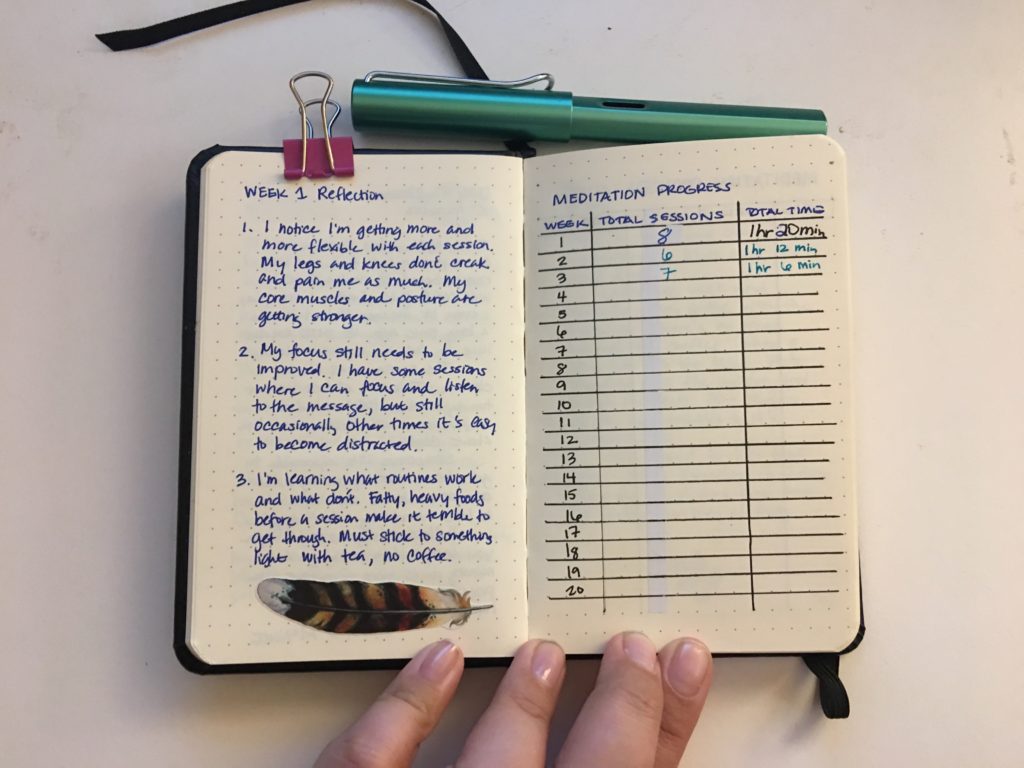
You may want to have built-in review periods for your journal, especially in the beginning when you’re first starting your meditation practice. In my case, I would reflect on my entries weekly, and write a few notes of commentary to remember for the following week. These notes can be observations, ideas for improvement, etc.

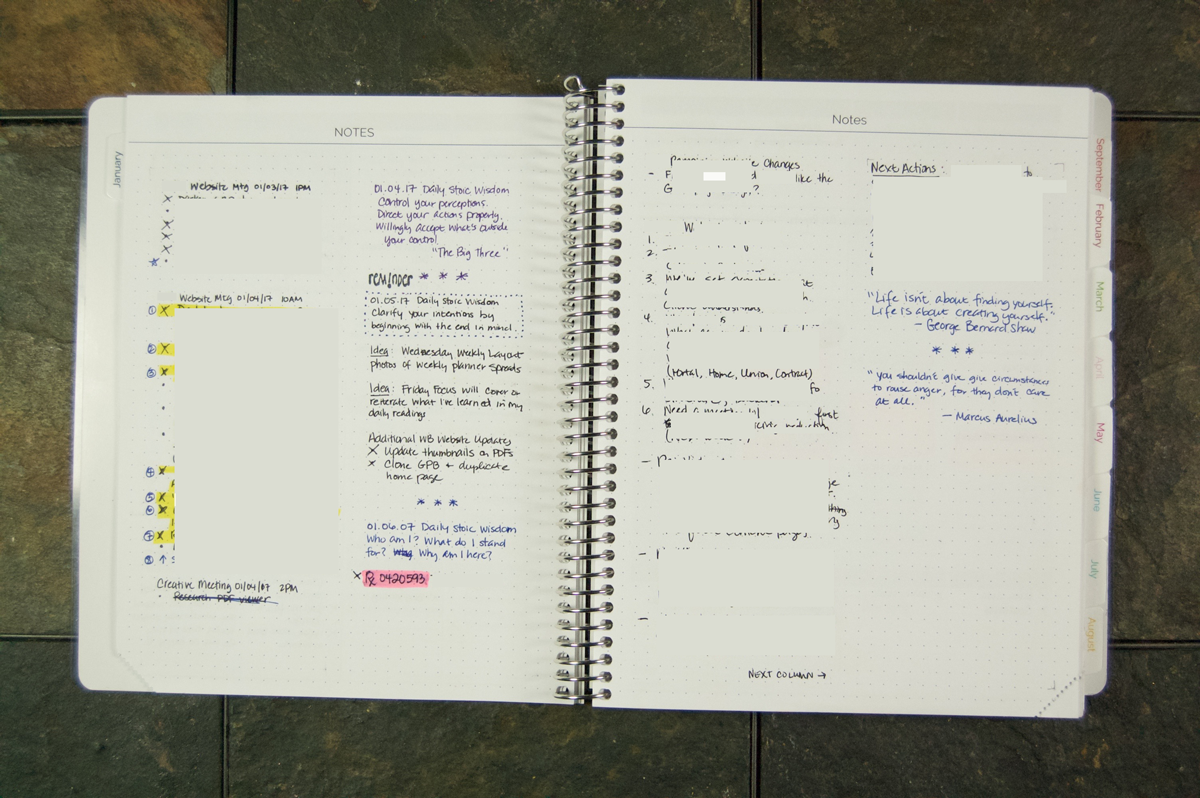
Double-Entry Journaling

While researching additional ideas for this post, I came across an article by Bodhipaksa at wildmind.org. One of the ideas he brought up was double-entry journaling.

In this method you leave every second page blank in your journal – you only write on the right hand page. Then when you do your weekly review of your journal you can make notes on the left hand page. Those notes might include further reflections on some aspect of your experience, or may pick out particularly significant things that you have learned.

For those who want to get the most out of their journal, double-entry journaling may be the way to go.

Ready to Start?

A meditation journal can be a rewarding accompaniment to your meditation practice. You do need to be careful because you don’t want your journal to be the focus of your sessions. Always remember that the journal is just there to to be a silent observer and should not be the focus.

How to Be the Family CFO Book Review

Almost ten years ago, I came across this book through one of my financial blogging gurus. I was in an economic renaissance: I had already paid down most of my credit cards, and I was improving my spending habits. The concept of approaching family financial planning like a CFO was something I’d never considered before, but I wasn’t in a “family” per se. I was just me, living my pseudo single life, with no significant family financial obligations other than the usual rent, wher I would be dining out and insurance—for which I always have to head over to DMP Finance to take care of it.

I shelved it and decided I would pick it up at a time when I would need it.

So what better time to learn about family financial planning other than right now when Craig and I are taking some major steps together?

I remembered this book and decided to dig it out of my neverending Amazon wishlist of books. It seems to be out of print, but I was able to find a used copy for a few dollars.

There are a couple of things I like about How to be the Family CFO: It’s a short read–only around 200 pages. So you can finish it in a week (or a weekend, if you’re a fast reader). Also, it’s written by someone who has learned from their mistakes. Not only did she became wealthy overnight, but she also lost it all in the blink of an eye because she knew nothing about money and entrusted other people to manage it for her. So now, she’s taught herself not to make that mistake again. I have so much more respect for someone who has learned from their mistakes than someone who has never made a mistake at all. Learning by experience is valuable.

Important Takeaways on Family Financial Planning with How to Be a Family CFO

There are so many things in this book that I’ve found valuable. I don’t want to give too much away; I’d rather just encourage you to buy it yourself or borrow it from your local library and read it. Like I mentioned earlier, it’s only 200 pages. Furthermore, it’s divided into five main sections:

  • Be the Family CFO
  • Plan Prudently
  • Save Prodigiously
  • Invest Wisely
  • Manage Risk

I’ll cover 3 key things that were significant takeaways for me.

Plan Prudently

As a CFO, you have three major areas: planning, managing assets and liabilities, and managing behavior.

The first thing I learned about the CFO’s planning process is making sure you have a personal financial statement, for this, setting up a Checking account is a must. When I first entered the workforce and began managing my finances, I learned about personal financial statements. At the time I thought it was too complicated for my needs, plus I didn’t have many assets or investments of which I needed to keep track. Once you begin building savings and acquiring retirement accounts, you’ll want to start tracking those assets.

Monthly might be too frequent, but quarterly should be sufficient. It’ll be the reporting mechanism that shows you how you’re doing so you can make adjustments when necessary.

A personal financial statement contains an income statement and a balance sheet. An income statement shows where your money comes from, what it gets spent on, and how well you save. A Balance Sheet compares assets to liabilities to determine your net worth.

As you begin to collect a record of personal financial statements, knowing how you did in the past will help you project your future. Read more about personal financial statements and download an example.

Save Prodigiously

The next section in this book is all about saving. Create a 6-month emergency fund, which isn’t new to me. It’s something I’ve heard over and over again from financial experts. Did I heed their advice? Of course not. But here we are.

Here are some strategy tips behind setting up your emergency fund:

Emergency funds are only used for when something disrupts your income (i.e. permanent or temporary job loss, serious illness). Your budget will cover other “emergency” expenses like broken washing machines, flat tires, etc.

Emergency funds should cover six months of necessary living expenses. Knowing what your necessary living expenses are is where the personal financial statement becomes useful.

Emergency funds should be liquid, earn interest, and not be subject to any fees or losses.

Invest Wisely

Investing has always been this mysterious, voodoo magic that I could never wrap my head around. Am I now an investing wizard after reading this book? Not at all, but there are some concepts that I’ve managed to grasp as a result.

I’ve always had it in my head that investments were something that you set aside to grow, untouched over time. “The measure of wealth is not the size of the portfolio as measured by its net asset value, but its ability to support a sustainable lifestyle indefinitely into the future.” That’s the ideal picture of wealth, right?

However, in this section, she talks about the income portfolio–more specifically the passive income portfolio.

Income portfolios are impervious to market decline as long as an investor has a long-term horizon. It’s much more flexible than a portfolio aimed at a future date. There’s no need to convert it if you do need it now (i.e. you won’t be crippled by taxes). Examples of passive income are rental properties and royalties. Think about it. If you have a portfolio that’s regularly making you money without you having to do much, that’s easy, right?

How to Be the Family CFO is an introduction to Family Financial Planning 201. It provides an adequate overview of more advanced personal finance topics without overwhelming the reader. For further information, visit this site.

Photo: iStockphoto.

Agendio custom planner

Hello Again, Agendio!

Writing in a planner has always been my thing ever since I was a little girl. When the digital age came about, I was swept off my feet and temporarily distracted by all the shiny expensive Apple gadgets. But it wasn’t long until I found my way back to my trusty planner. Now that I’ve discovered Agendio’s custom planners, I feel like I have the best of both worlds. I have the convenience and customizability of a digital planner with the tactile feel of a paper planner.

If you saw my previous Agendio custom planner post, you know what my 2016 one looked like. Here’s what my 2017 one looks like now.

Agendio custom plannerIt’s slightly larger than my old one in comparison, but certainly thicker. I decided to move up to a Medium size from the Journal size. Previously I had model no. 32068 which was just a weekly planner only, no monthly pages or notes pages, which accounted for the extra pages in my new planner. I also purchased notebook bands which keep my planner shut when in my tote bag or my purse. They’re really cheap on Amazon and come in a multi-pack of colors.

Agendio custom planner
For 2017, I upgraded to a Medium sized planner and added monthly and notes pages, which increased the size and thickness.

For my 2017 custom planner, I went all out. I did the combined weekly (model no. 32106) and monthly pages (model no. 32134). Rather than bore you with my monthly pages though, each week I’m just going to feature my weekly layouts since I’ll probably doodle in those more.

My week for January 2 – January 8.*
Looks a little silly with all the redacted information, but I think you get the gist. Besides, there are other moments where I make notes about non-work related things.*

* Has been edited to hide sensitive information.

My planner is used for both work and personal events and notes. I once tried to have a separate book for each but it just became frustrating. I am all about ease and efficiency anyway. Does it bother me that I have both types in one? Nah. I even once attempted to differentiate the two by writing in different colors, but again it was cumbersome at best. Why fix what wasn’t broken?

I’m considering making this a weekly post. Getting into the habit of reviewing my planner on a regular basis is not just a sensible practice (See Getting Things Done by David Allan), but it also helps my writing and my blogging too. Of course, seeing spreads where most of the text is redacted is no fun either, so I’m going to try and find a happy medium.

Free Content Schedule and URL Builder for Google Sheets

For bloggers and content publishers, you already know by now that maintaining a regular content schedule is the key to having a successful blog. I should know. I’ve never been able to maintain a consistent schedule, which is why my blog traffic really sucks right now. This is where the content schedule becomes essential.

Download It

When you click on the download link, the content schedule template will open in a new window.

Download the Free Content Schedule for Google Sheets

You’ll have to make a copy of it into your own Google Drive account in order to start using it. To do that, you’ll need to sign into your Google account as indicated by the red arrow in the screenshot. Once you’ve logged in, you should be able to fully access the File menu on the left. Make a Copy of the template into your own Google Drive and you’re ready to start working!

Free Content Schedule for Google Sheets

What Is a Content Schedule?

A content schedule, or sometimes also known as a content calendar or publishing calendar, is a calendar that helps you manage your publishing efforts in a timely manner.

There are multiple ways to develop a content schedule. Content schedules can live in spreadsheets, some in databases. Sometimes just a simple paper calendar with a few notes jotted down on it can be effective. It all depends on your needs and how you like to work.

Me? I like to work in spreadsheets because I’m a spreadsheet nerd. Plus spreadsheets can do a lot of cool things like calculate numbers and concatenate (one of my favorite words) stuff to automatically generate a desired output.

Why I Use Google Docs for a Content Schedule?

For me it was a personal preference. I’m an avid Gmail and Google Docs user. I also use iCloud and Dropbox as well. However, because I wanted something that a larger audience could use, I figured Google Docs would be better just because I assume almost everyone has a Google account.

So making this accessible to a wider audience was one goal. Making this accessible from any device with an Internet connection was another goal.

You can typically edit any Word or Spreadsheet doc from any device. Google has apps for both Android and iOS. And although one wouldn’t really want to copy and paste URLs into spreadsheets on their smartphones, this setup at least makes it possible in a pinch.

How do I use it?

Here’s an overview of how the content schedule is laid out. The Dashboard tab is basically where all your blog ideas get tracked and turned into content. As you get an idea for a blog post, you log it into this tab and fill in as much information as you can.

Below is a table with a description for each column of information.

Column NameDescription
Publish DeadlineDate that the post is set to be published.
Link*The live link or at least the permalink once it goes live.
StatusThis helps you identify what phase the post is in. I’ve setup default statuses in the Status Description tab, but feel free to modify them.
NotesThis is typically Google Doc link where I keep my draft and research notes. I have a template for this document as well, which I may share at a later date. For now you can link this to your own Google Doc, or ignore this column for now.
TopicA short memorable name by which you can call your post.
Campaign*Each post should belong to a campaign. If you don’t want to get too granular with your campaigns, just use the default newPost campaign here. I’ve already built that into the template.
TitleThe optimized title for the post.
Focus KeywordThe keyword you plan on optimizing your post for. This is especially useful if your blog is built in WordPress and you use the WordPress SEO plugin.
CategoryThe blog category that your post gets assigned to.
VideoWill there be a video for this post? Yes or No
Shoot DateDate
Edit DeadlineThis is the deadline for video editing.
YouTube DescriptionThe description that you can copy and paste into the YouTube info page.
Publish LinkThe live link for the video once it’s been published.

(*) = Column names are required.

In my own workflow, I have 5 stages that a post goes through: Concept, Draft, Schedule, Publish, and Re-write. Not all posts have to go through the Re-write stage. That stage is for old posts that need to be refreshed and re-promoted.

Once your post has gone through the various workflow stages and is already published, it’s ready to be promoted. This is where tagging will track your promotion efforts.

To create your tagged URLs, copy and paste your published permalink into the Link column of the Dashboard. Make sure you have the appropriate campaign chosen in the Campaign column. Now click on the Link Tagger tab.

You’ll see some of the information carried over from the Dashboard already: Topic, Link, and Campaign.

You’ll need to fill out the remaining information such as Source, Medium, Content, and Term–basically the columns with a “-” (hyphen) in the cell.

Here’s a quick-and-dirty Google Analytics beginners lesson on campaign tracking (if you’re already a pro, you can skip to the next paragraph). Your Campaign, which we’ve already defined, is basically an overall marketing objective you’re working to achieve – from organic Instagram growth to increase in sales. The Source identifies where the traffic is coming from. The Medium is most often the marketing medium such as “banner”, “email”, or “cpc.” The Content helps you to differentiate between various ads (however, because I don’t do any paid advertising, I use this to identify the post content). The Term column is the paid keyword, but again if you’re only using this to track your organic social media efforts, you can skip this column.

Now you filled out all the proper columns, you can already see the generated URLs on the right. So to use a tagged url on Facebook for example, all you have to do is copy the generated URL under the Facebook column and go to another tab where you’re logged into your Facebook account. Then paste the URL in your status update. After a few seconds, the post will auto populate (as long as you’ve got all the proper open graph data implemented of course–but that’s another lesson).

I think at some point I’ll create a demo video on how to use this, but for now I’ll just leave as is. If you have any questions, post them here. Thanks!

I’ve Been Following My Own Agenda with Agendio for a Year Now and Here’s My Experience

I bought my first Agendio planner a little over a year ago after discovering the company while browsing a Facebook group on personal organizers. I’ve used of Franklin Covey planners avidly for years. Personal organization is something I invest a lot of thought, effort, and time into. For me, it’s not just about doodling and making pages look pretty. It’s about making sure a spread in a notebook effectively documents what I’ve done and what I need to do in order to progress forward and live a productive day.

Not to knock any of you who do like to draw and make pretty checklists in your planners, but that motivates you and I applaud whatever motivates someone to be productive. But stuff like that doesn’t motivate me, it just distracts me and wastes my time and I end up getting frustrated.

So here are a few quick facts about Agendio planners before my video review.

Who/What Is Agendio?

Agendio creates customizable planners AND refills for both Franklin Covey, Filofax, and Day-Timer planners. Can also choose letter-sized punched or non-punched. At the time of this review, Agendio prints their planners on 90 gsm paper, which is decent weighted paper for those of you who like to use fountain pens to write.

In my experience, production and shipment time takes about 2 weeks.

Where Do You Buy Agendio Planners?

Online via their website at agendio.com.

How Much Does an Agendio Planner Cost?

They cost roughly $30-$45 depending on how you customize it. After shipping and extras, you can expect to spend up to $50 for a planner.

2016 Agendio Weekly Spread
Here’s a sampling of what divisible options you have available to you: dotted (or solid) lines of varying widths, lists, blank divisibles. Each one can be labeled to your liking.

What Can You Customize in Your Agendio Planner?

At the time of this review, you can customize:

  • Wrap cover color
  • Print color
  • Fonts
  • Date styles
  • “Divisibles” (Individual sections on a spread in your planner)
  • Extra pages

The NEW and IMPROVED Agendio launches November 7 and will feature the following:

  • Customizable covers
  • Unique monthly colors
  • Daily planners
  • Create your own extra pages
  • New tabs that you can customize
  • Decorative elastics
  • New wrap cover colors
  • Heavier weighted paper (120 GSM paper for weekly and monthly planners)

Already interested? Here’s my referral link:

Shop Agendio Planners

Watch My Review Below

https://www.youtube.com/watch?v=5T2Gvlq5m18