What’s Growing On: Week 15 Pandemic Edition

We’ve been in lockdown for a month now which means I’ve been working from home for a month now too. The nice thing about being from home most of the time is I have the time to be able to devote time to all of my projects around the house, including the garden.

Let’s begin with some of the flora.

First of all, the rose that started it all, Peace, did not survive the winter. Last year, it was already showing signs of being taken over by its root stock, but I was able to fend it off for a while. Not this year. Peace passed away quietly and finally allowed its root stock to completely take over. At some point before the weather gets too hot, I’ll have to remove the remains and fill the spot with something else.

The only new growth you see here is from the root stock. The host growth is completely gone.

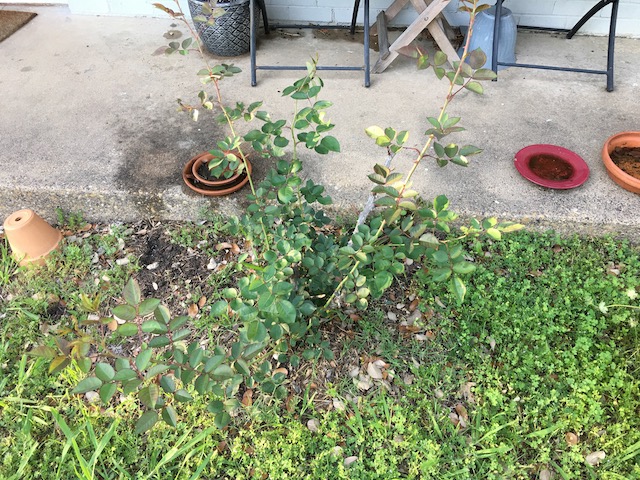
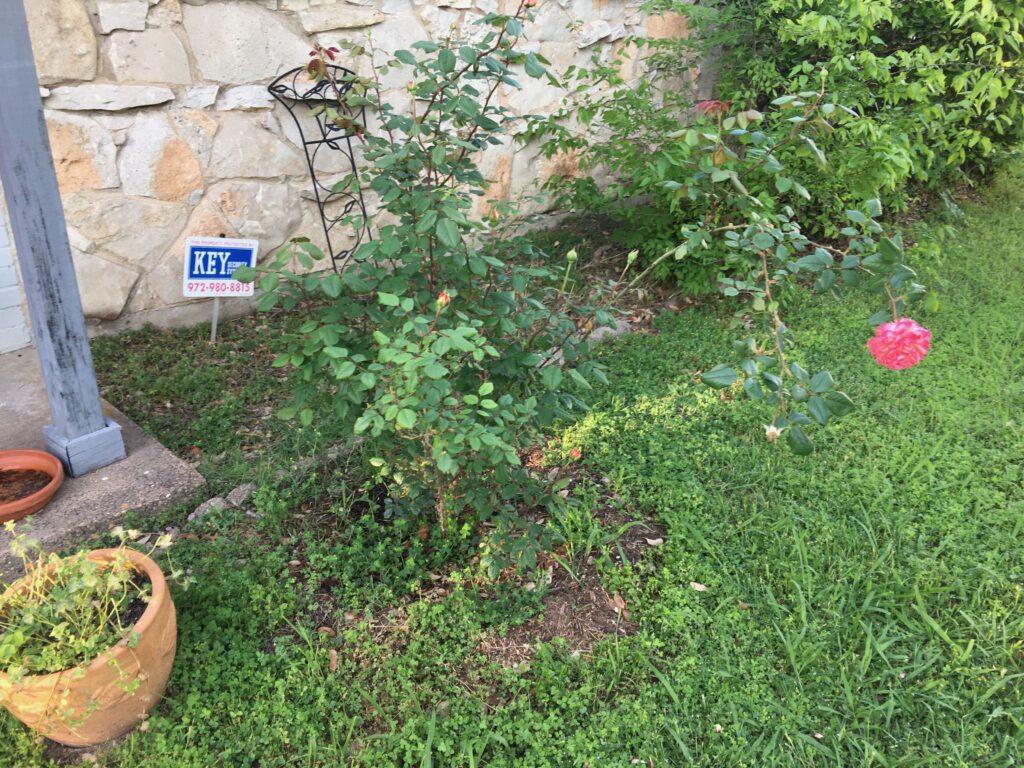
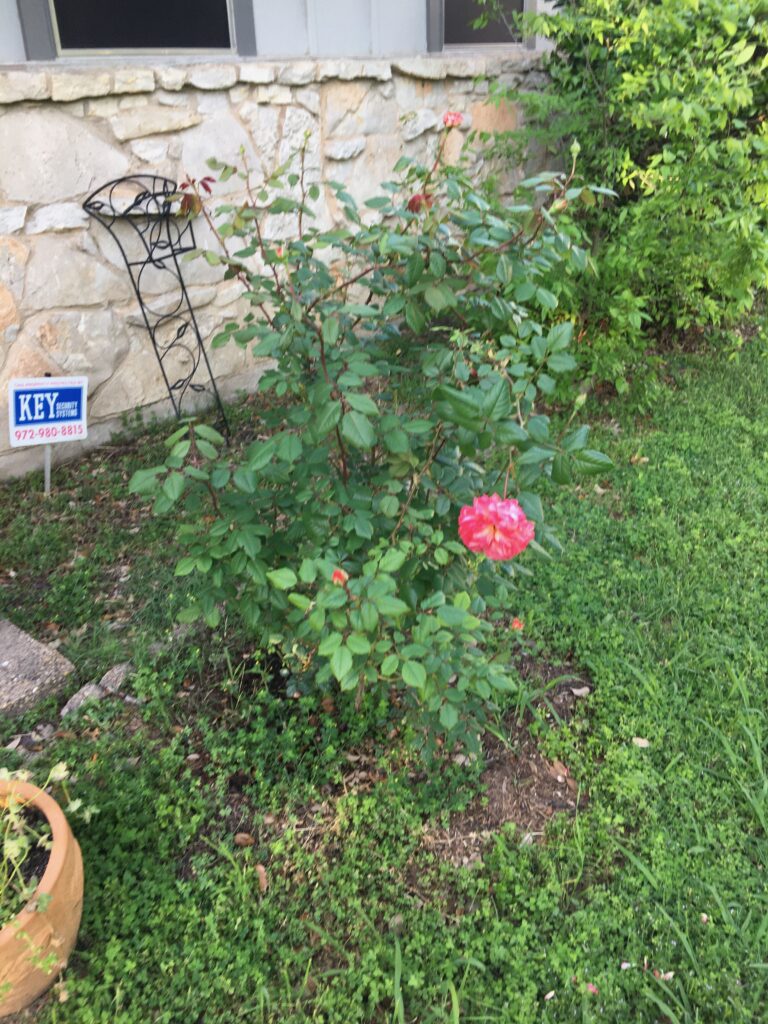
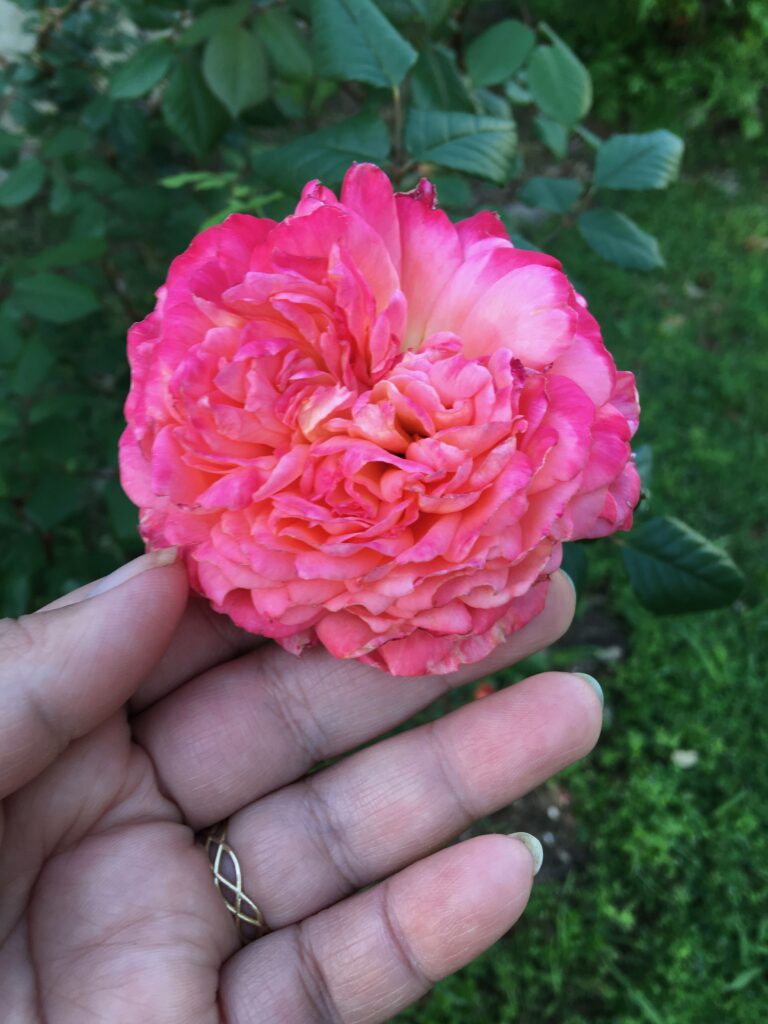
My second rose, Portlandia, gave me a scare early in the season. Initially I was concerned it was infected with the deadly RRD (Rose Rosette Disease). It was showing most of the tell-tale signs: bright red or burgundy foliage, weak stems, unusual growth. The only thing it didn’t show was the excessive thorns which is a common characteristic of infected rose bushes.

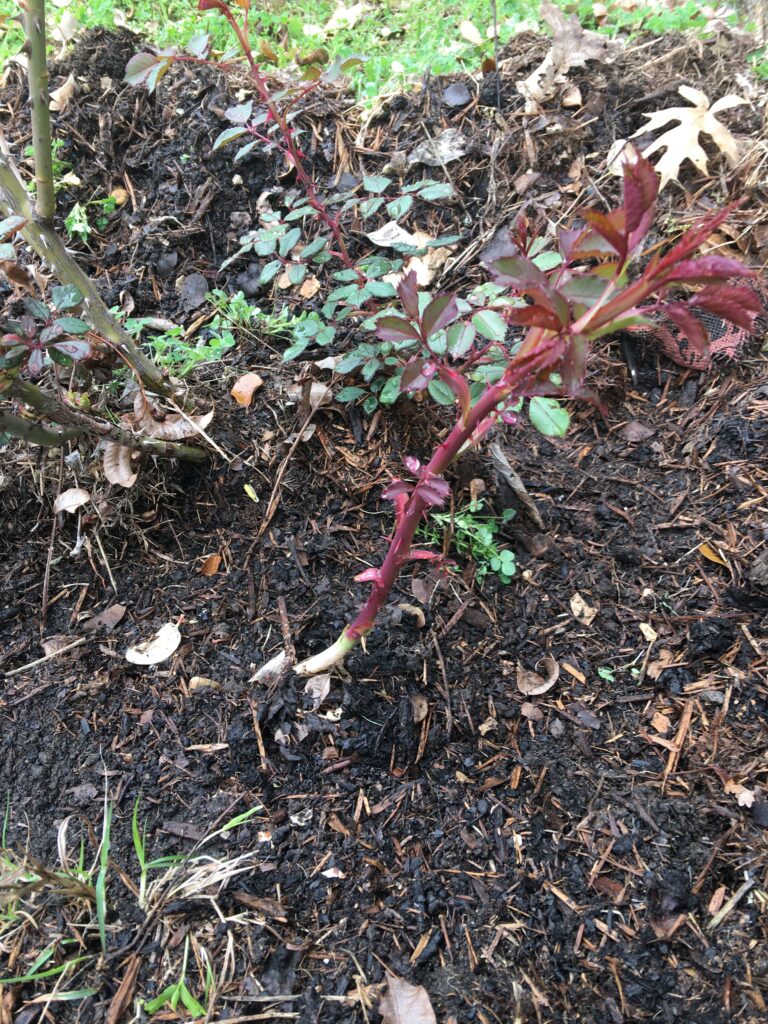
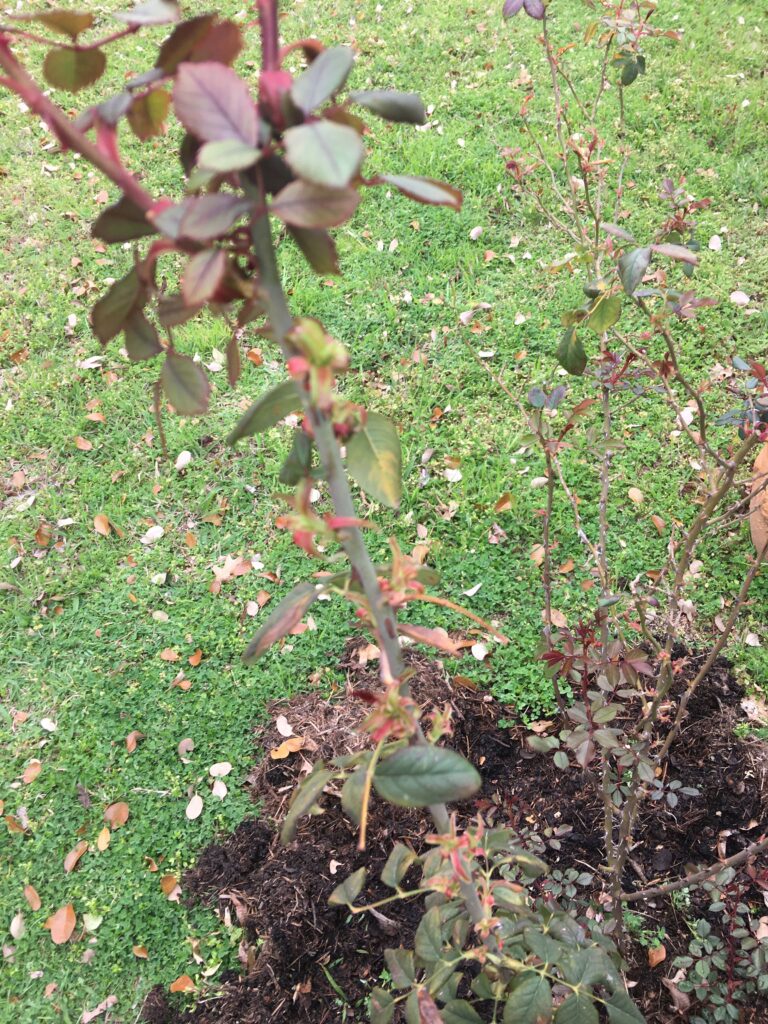
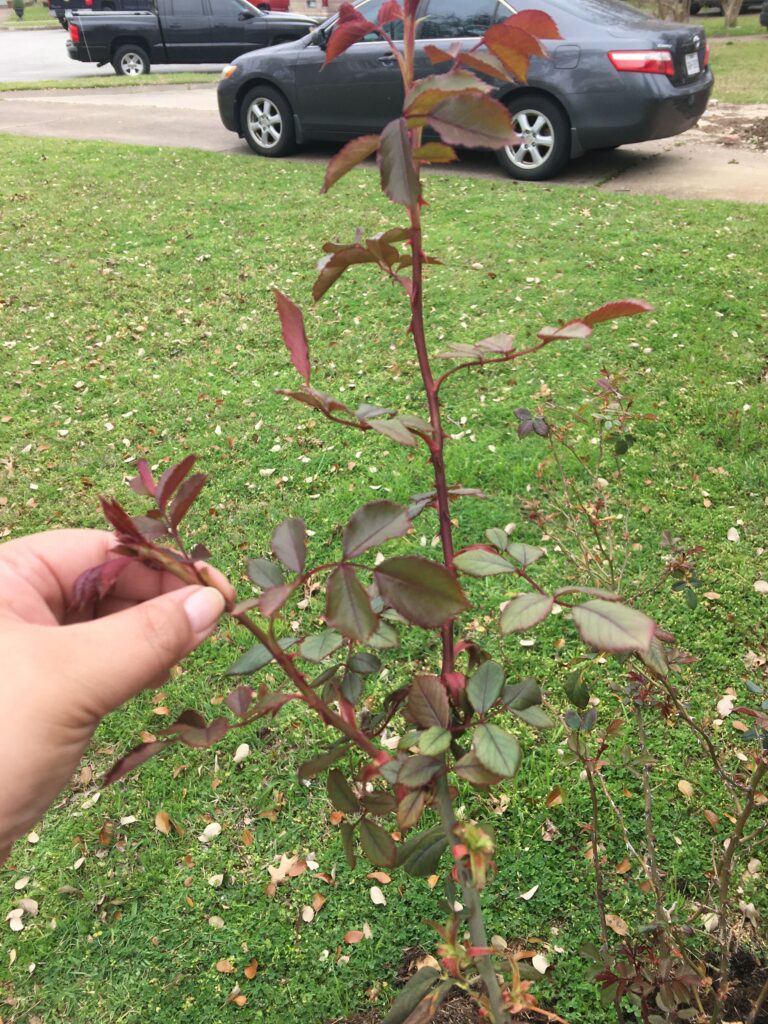
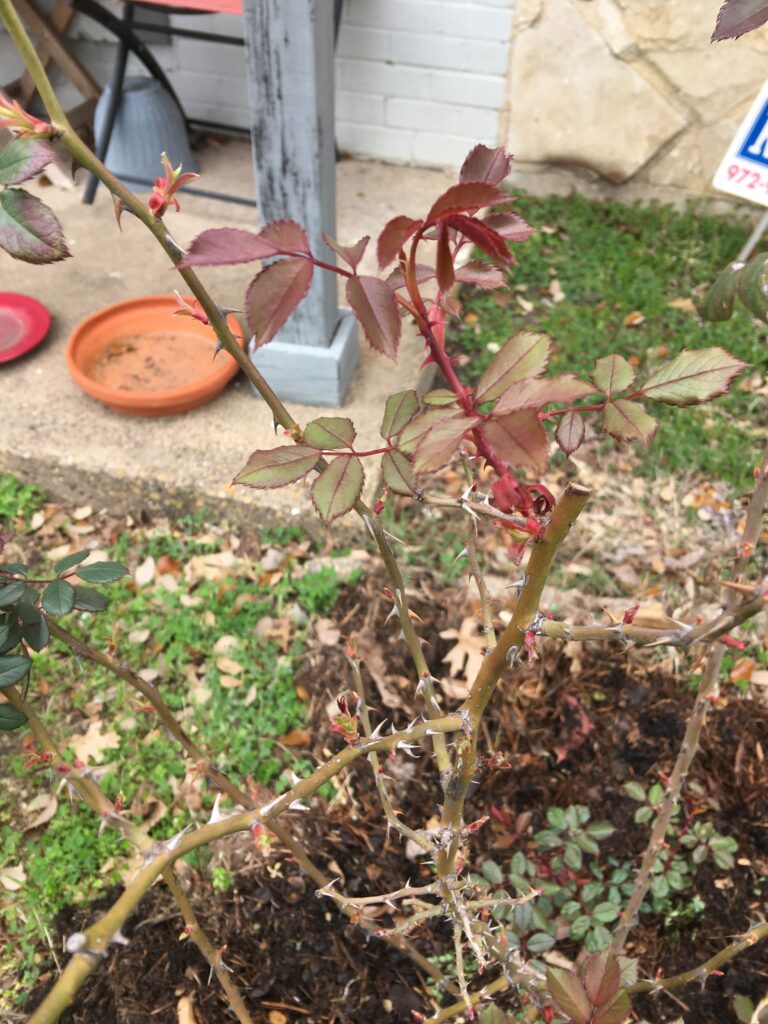
Most rosarians recommend to observe the rose over a couple weeks because sometimes the burgundy foliage can be mistaken for new, healthy growth. So I did, and over time, the red foliage turned green and at least one of the buds opened to a healthy, signature Portlandia bloom. What a relief because it would’ve broken my heart to have to dig up and toss out this rose. This was the rose I purchased to signify our wedding event.

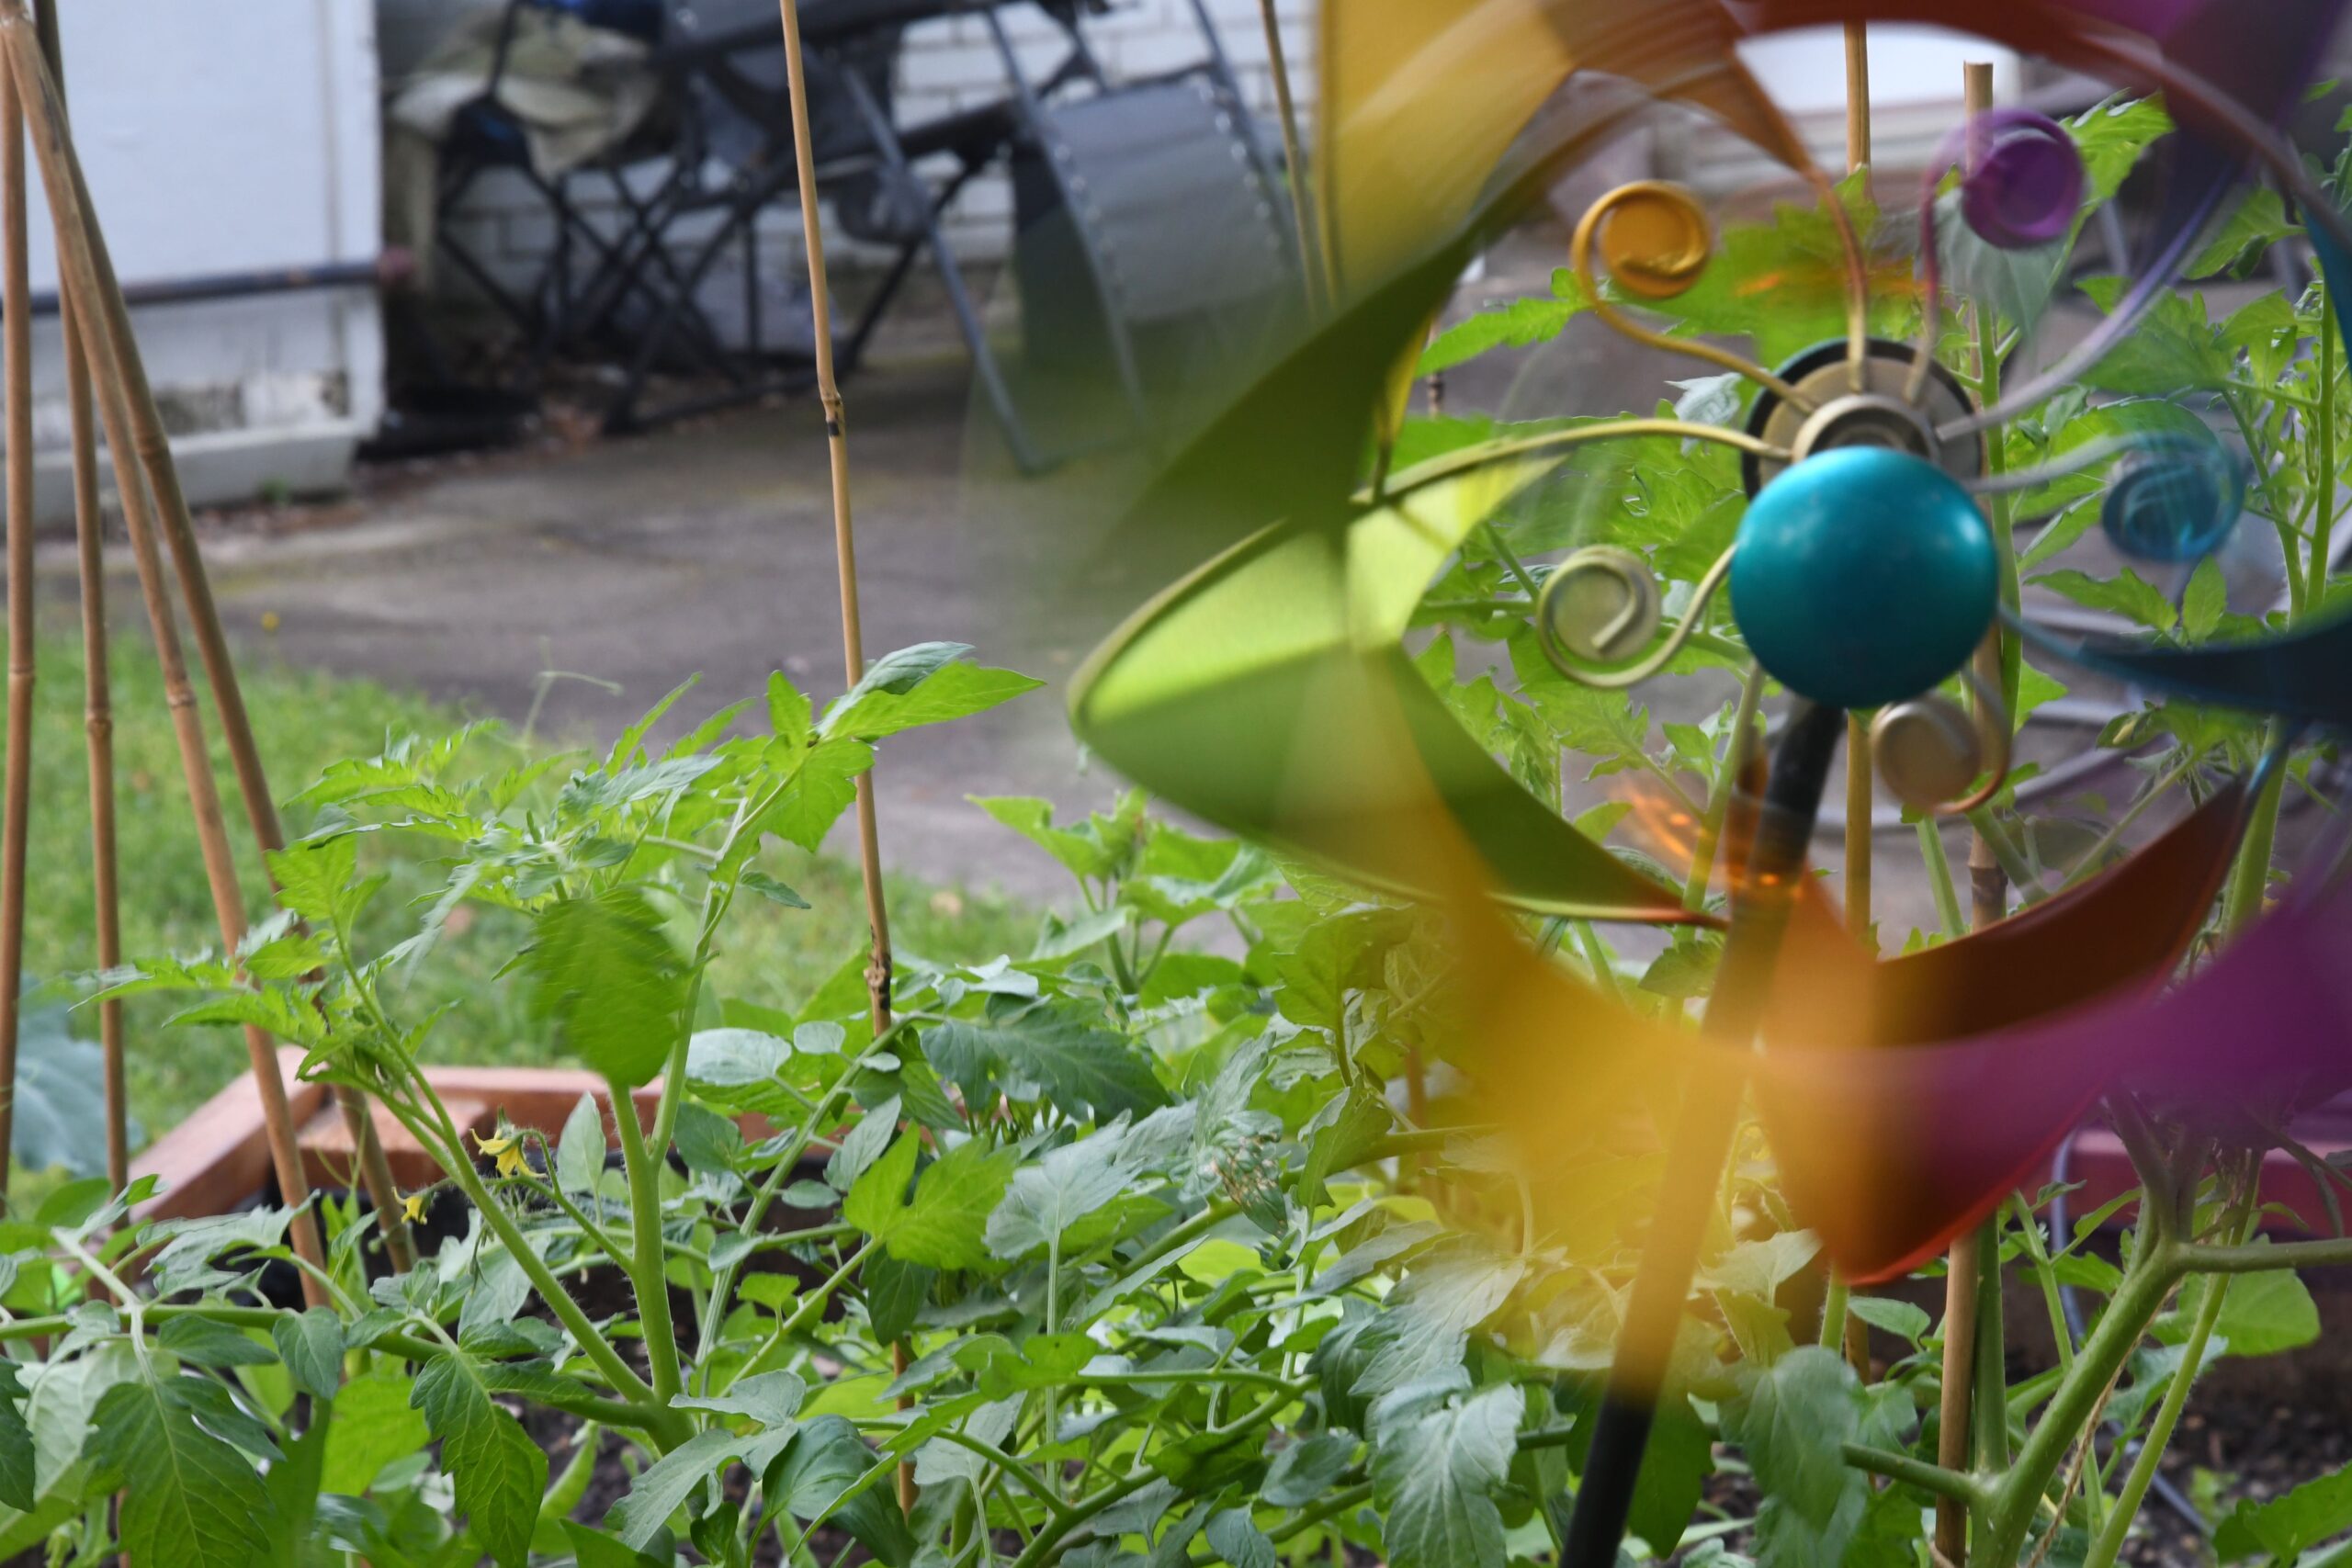
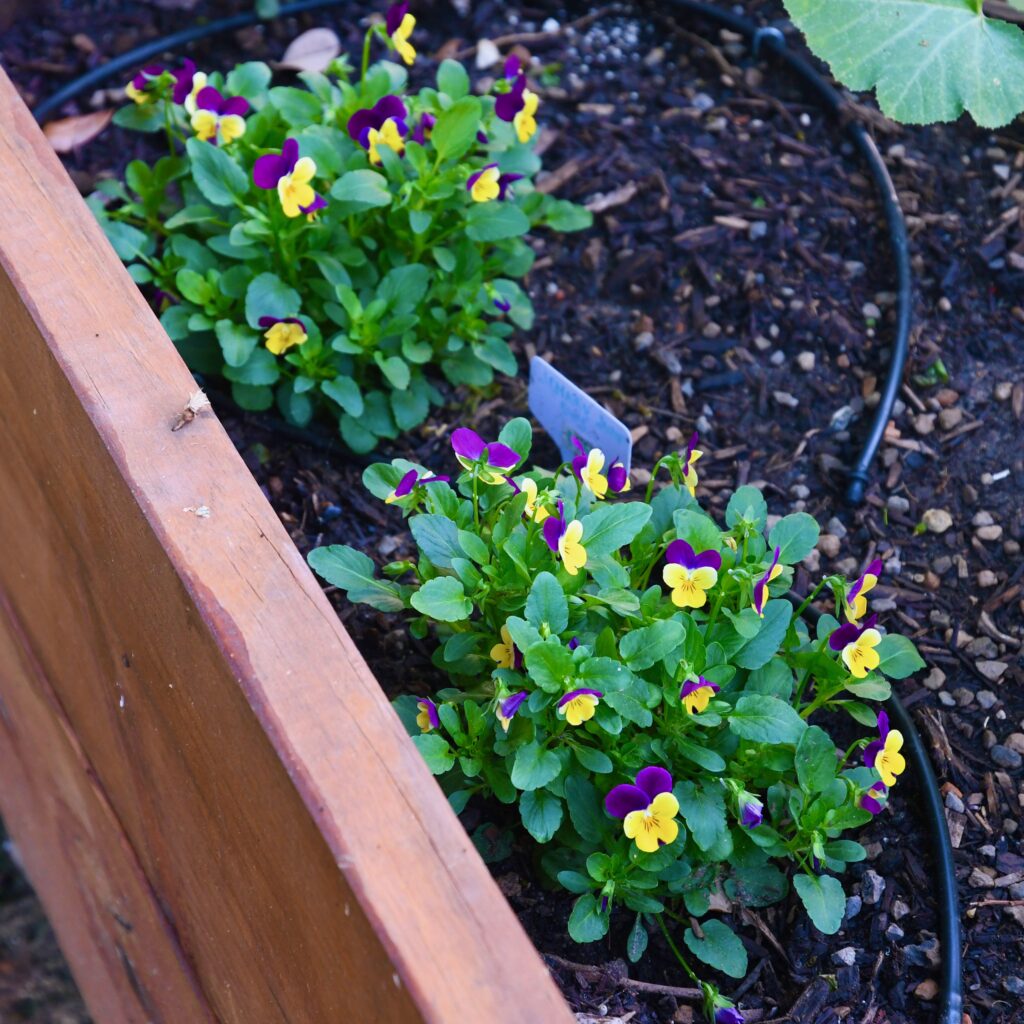
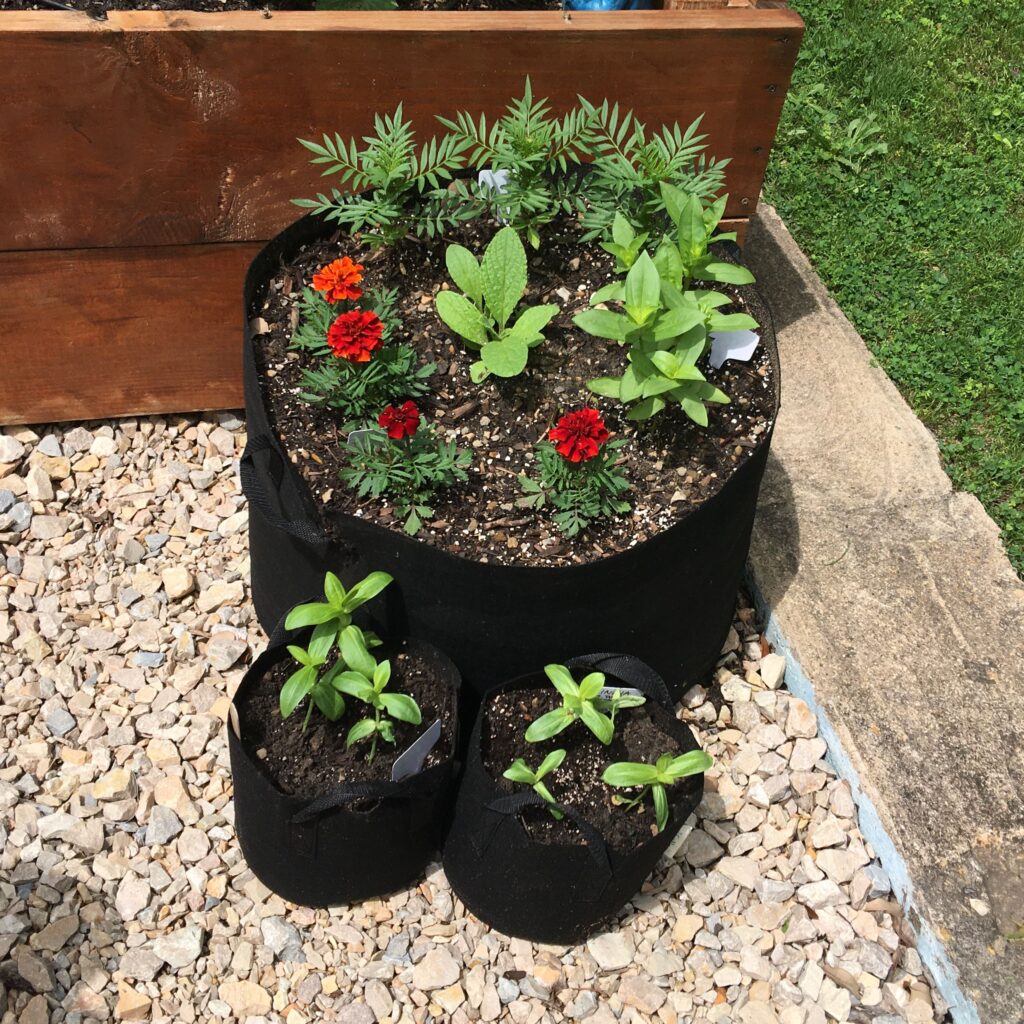
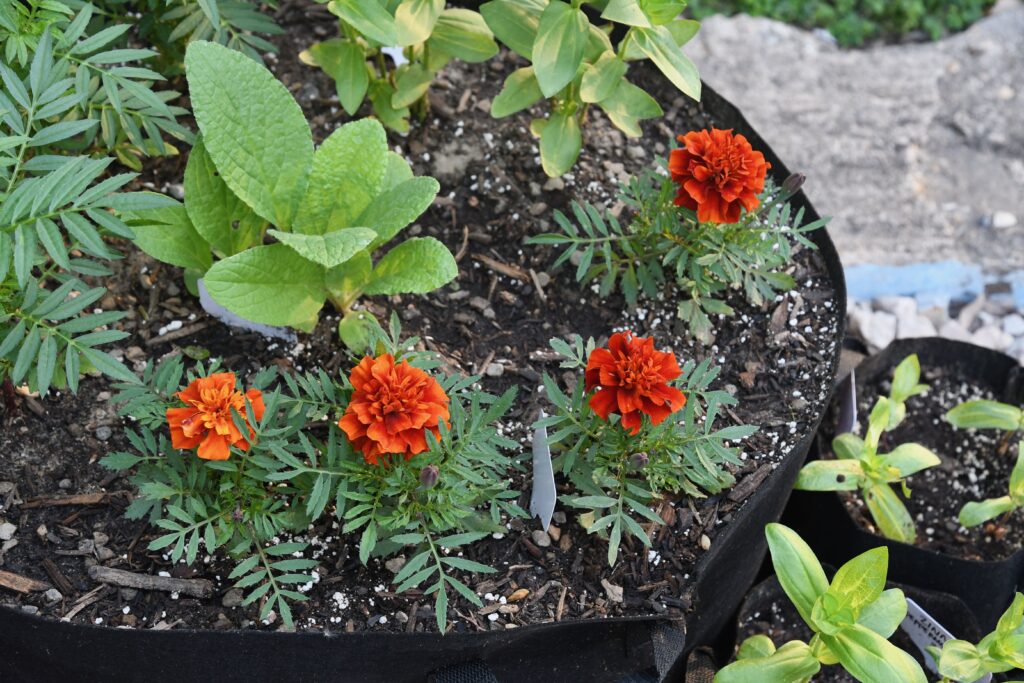
I’ve added some annuals to areas around the vegetable garden because it helps with the pollination. Flowers such as violets have been providing a continuous cycle of blooms for 4 weeks already. The set of Fireball marigolds I started several weeks ago have already provided their first set of long-lasting blooms and are now working on their second. The zinnias have just started forming their first buds.

This morning, I was doing some upkeep around some of the tomatoes when a little bee came buzzing out of the squash plants right next to me. I stepped back, startled, and gave him his space. He buzzed around a bit before landing on some of the tomato blossoms and then moved over to the marigolds and then back over to the squash. Witnessing this brought me a lot of pleasure because I was wondering whether or not it would be worth planting any pollinator flowers the first year. As if my garden needed more time to gain traction on the Pollinator’s Yelp website before any of them would start visiting.

But no, mother nature didn’t need a social network to ensure the cycle of life continued. Somehow everyone just knows what to do, when to do it, and where without any interference whatsoever. It just shows how much smarter nature is than we think.

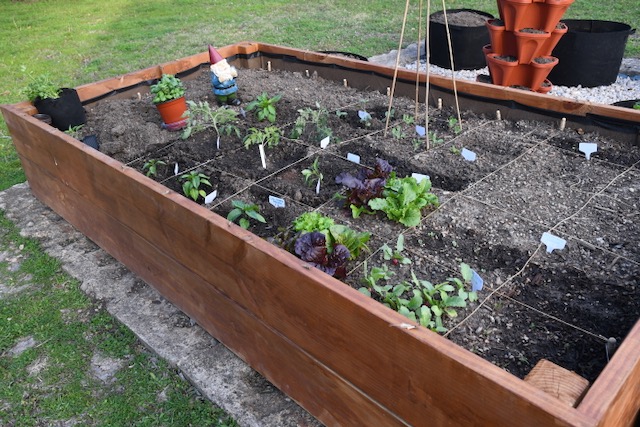
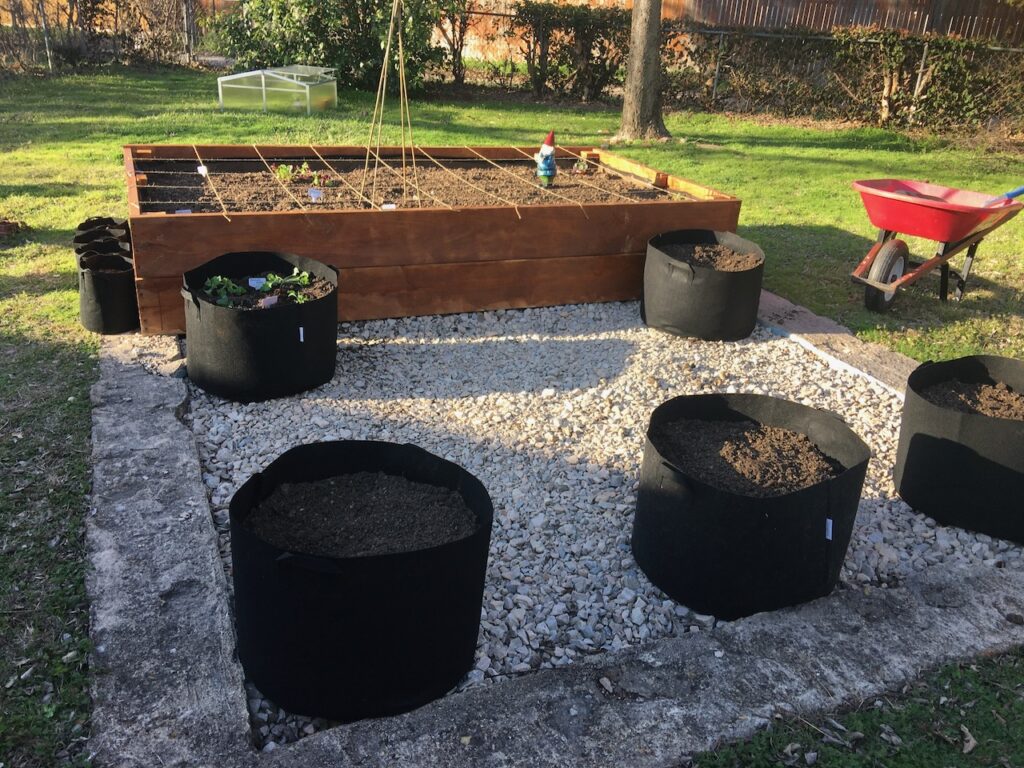
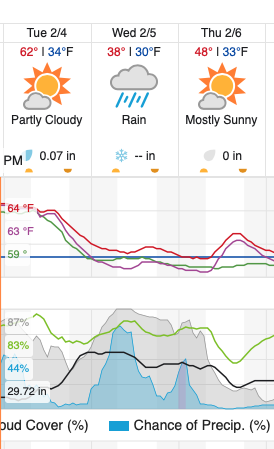
The vegetable garden is doing great as well. If north Texas would at least stick to having consistently cool, spring weather rather than these random cold snaps, I think the garden could be more productive. It hasn’t really stopped us from being able to enjoy a constant supply of lettuce, kale, and more recently sugar snap peas.

Peppery French Breakfast radishes and some Sugar Snap Peas

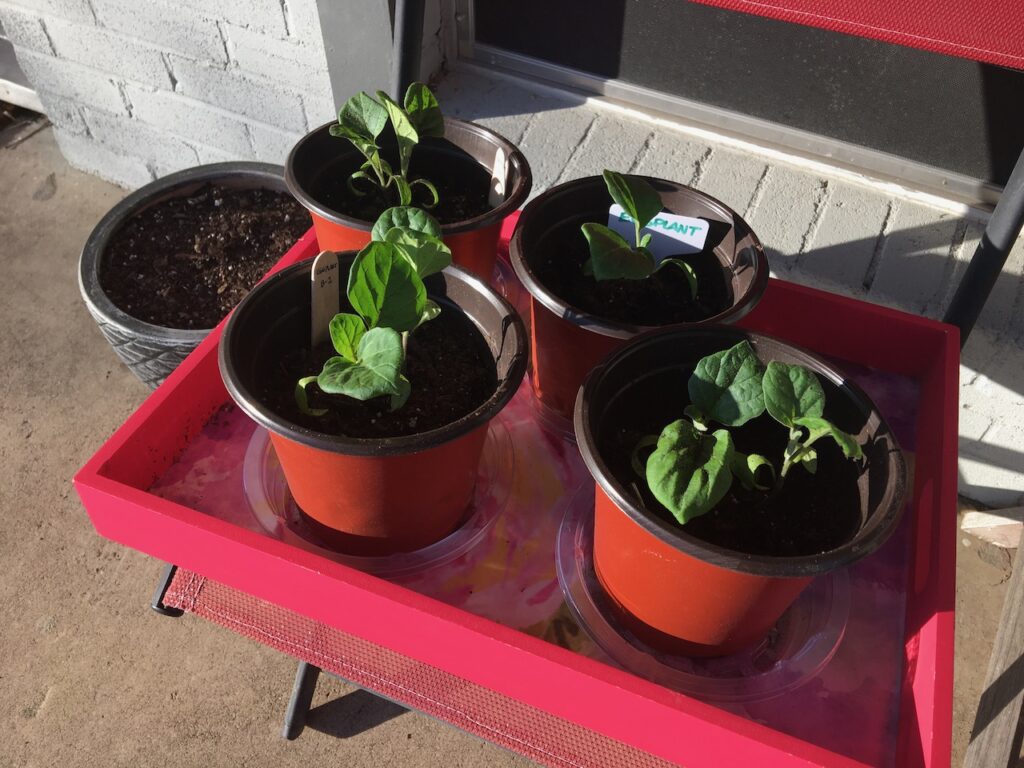
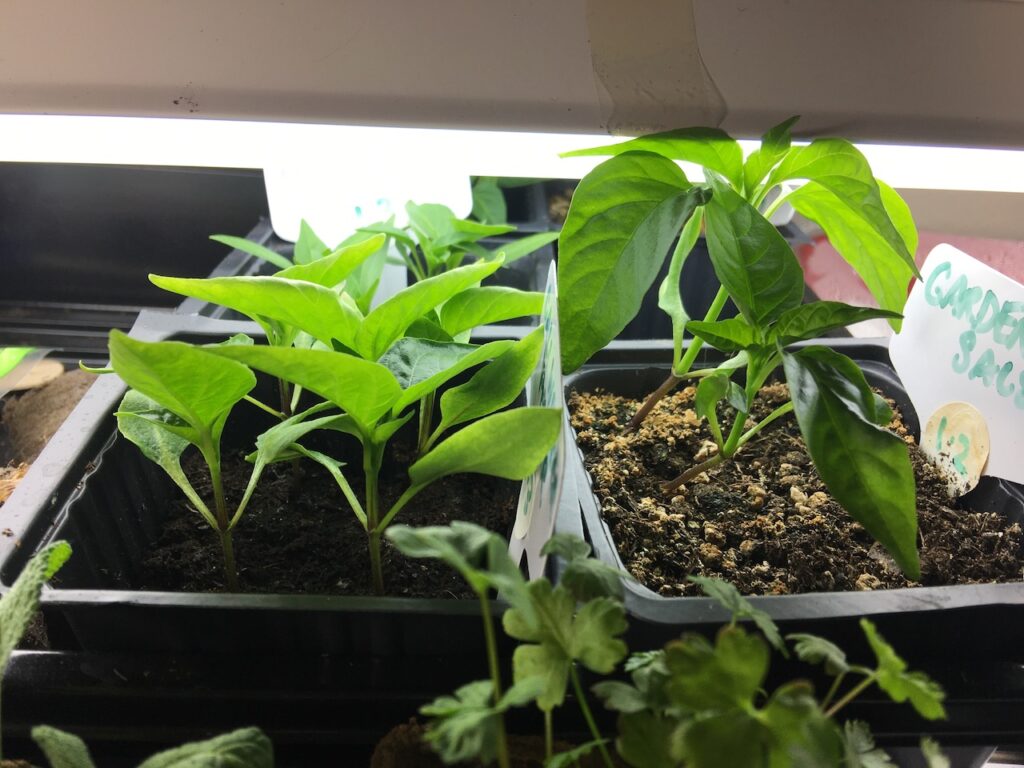
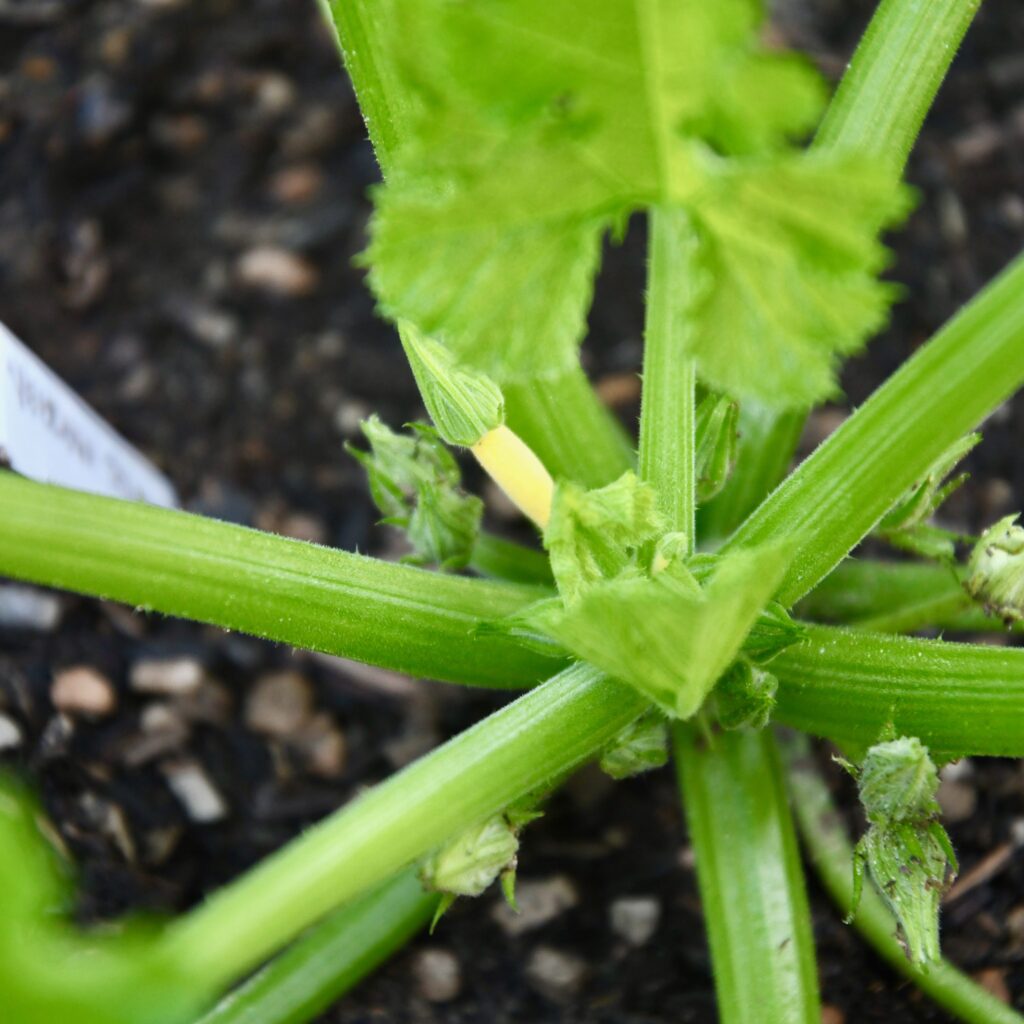
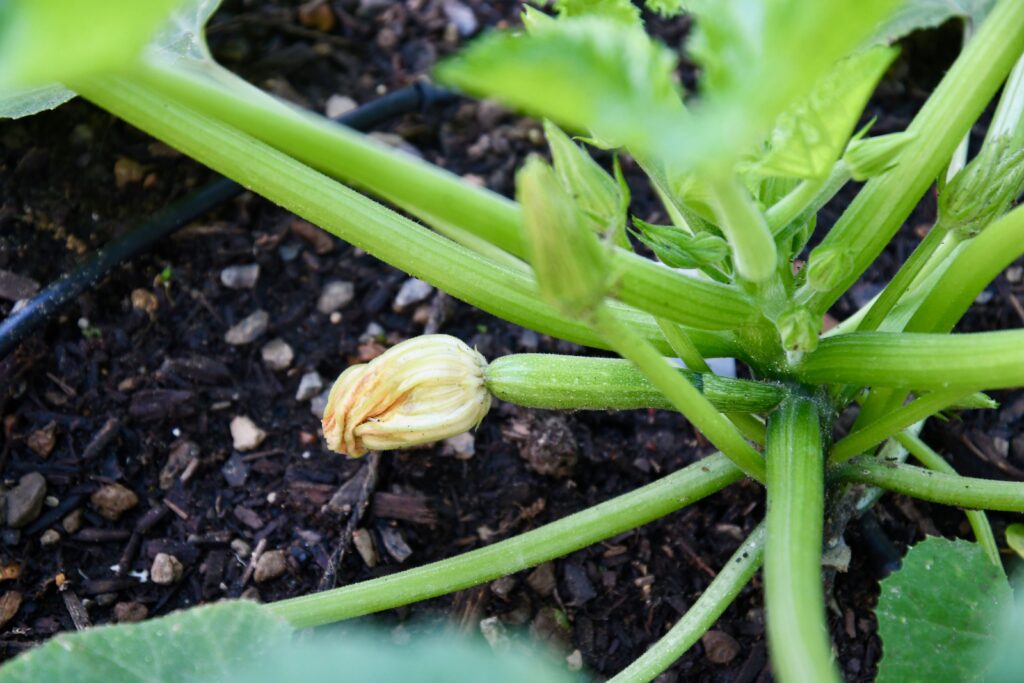
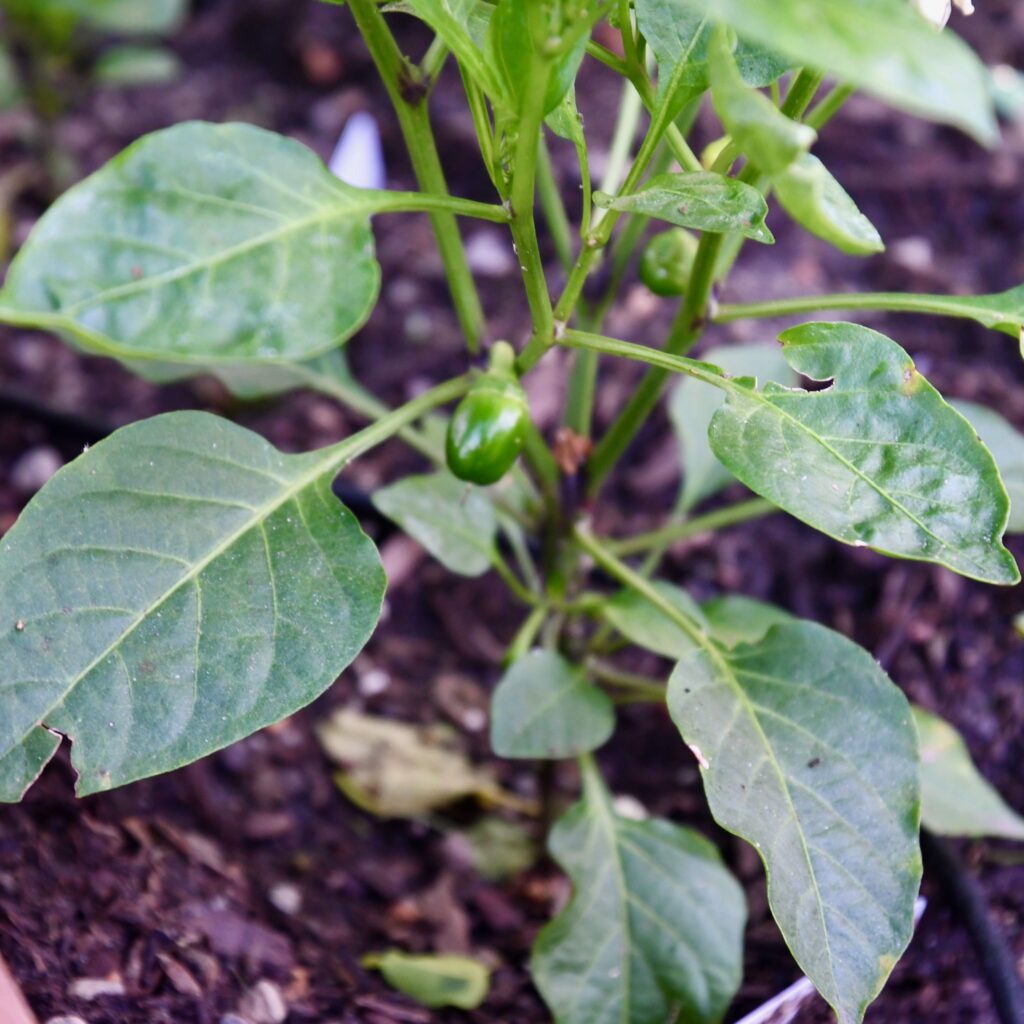
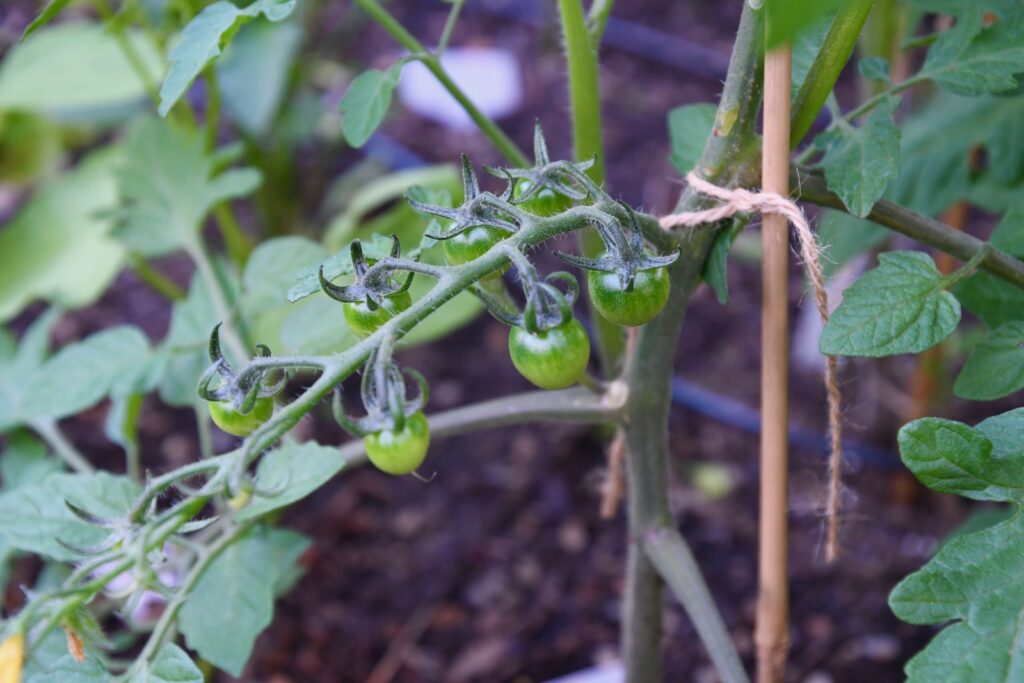
I am eager to get to try some of those tomatoes and peppers, but I know those are weeks away from being ready. In the meantime, you can just admire the photos of these little bursts of green that are forming.

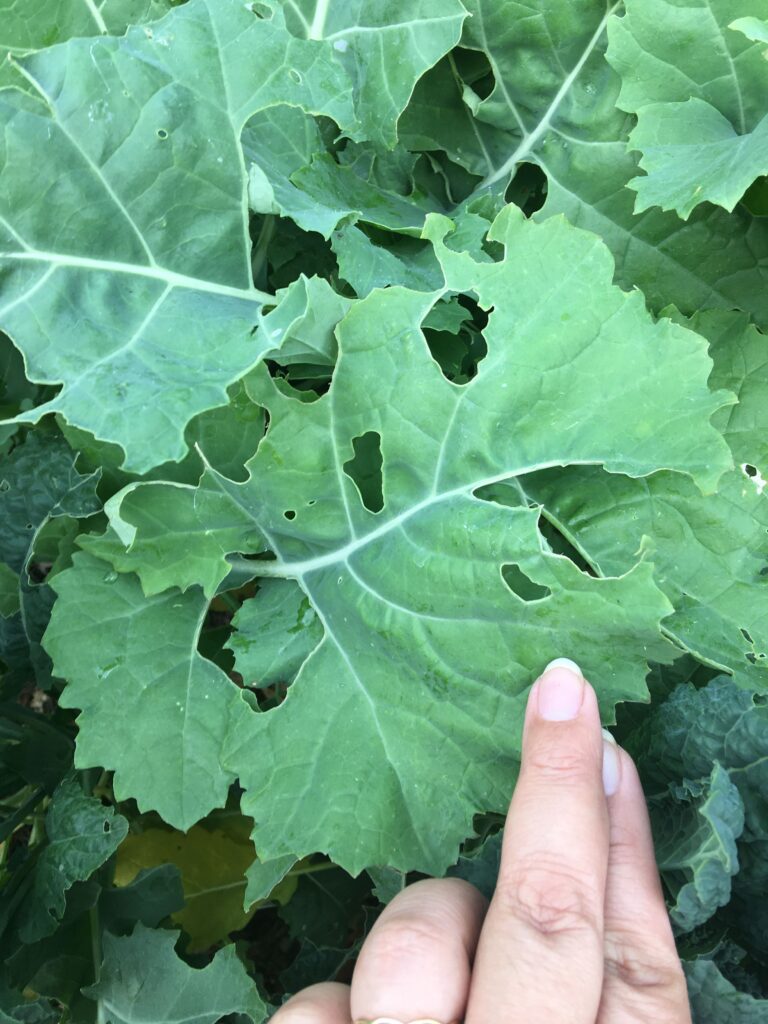
Garden Pests and Failures

There are a few things that I’ve had issues with though. We have an uninvited guest consuming some of our kale and although it hasn’t stopped us from harvesting the untouched kale, it does reduce our available harvest. After researching, I found that there are some natural repellants that I could’ve used in the beginning, such as rosemary oil or peppermint oil diluted in water. Those mask the scent of the greens that attract the pests. However, I don’t know if that will ward off an infestation that’s already underway. I can probably try and see what happens. Maybe it’ll at least slow it down.

Some of the damaged kale.

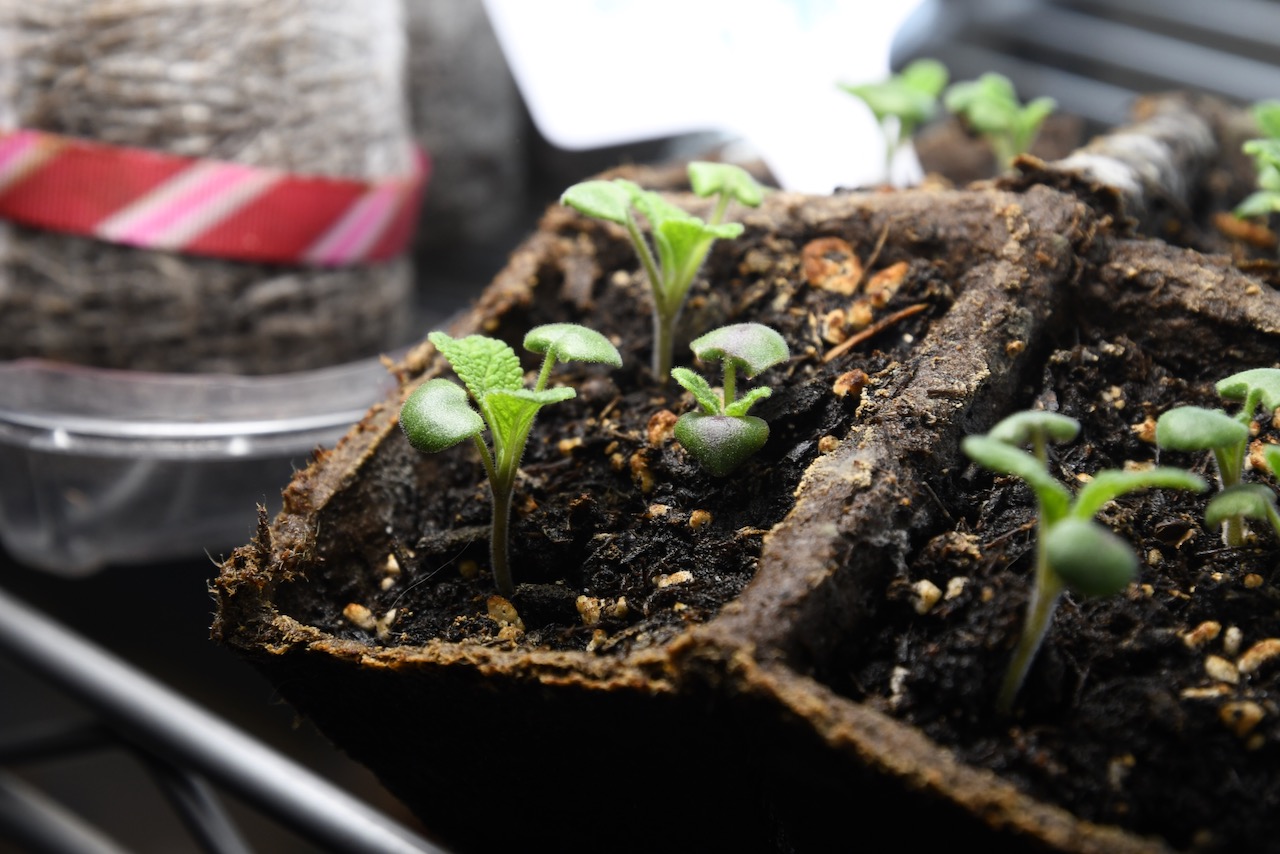
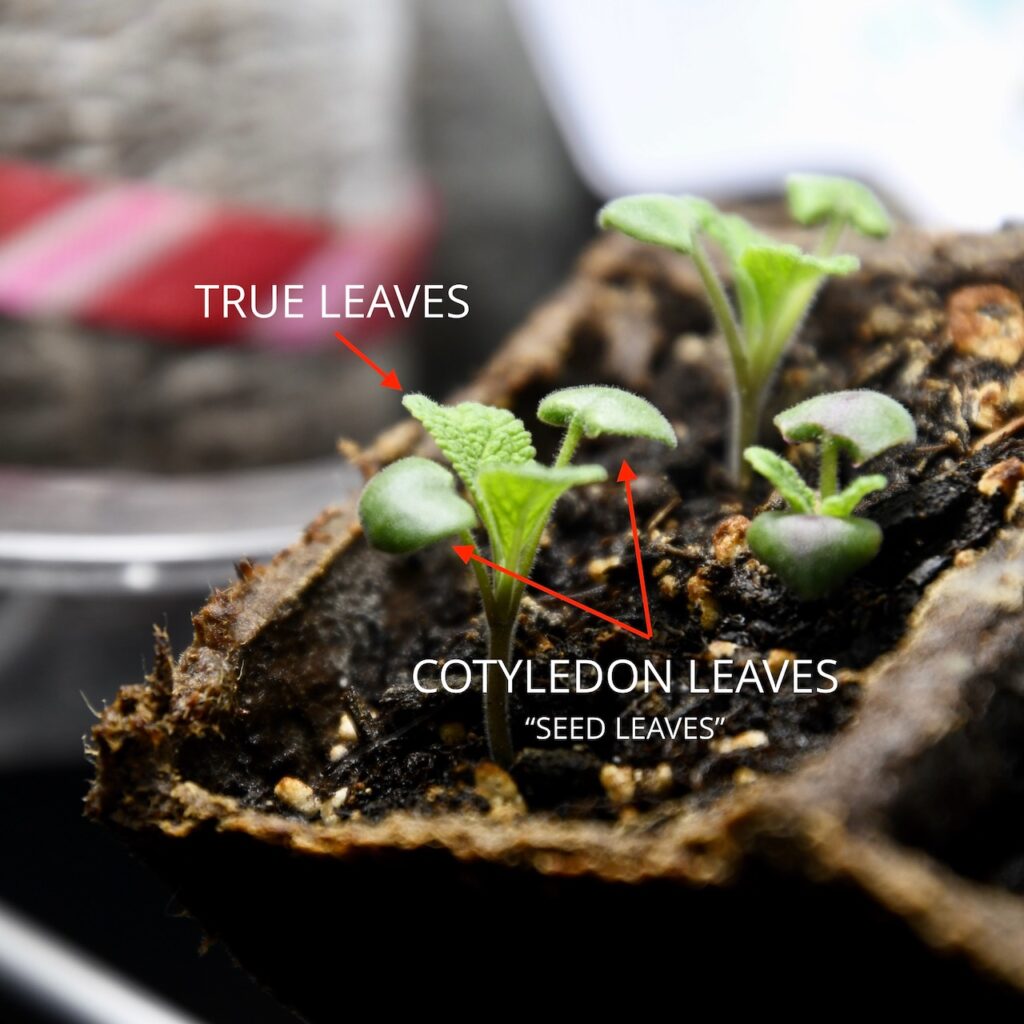
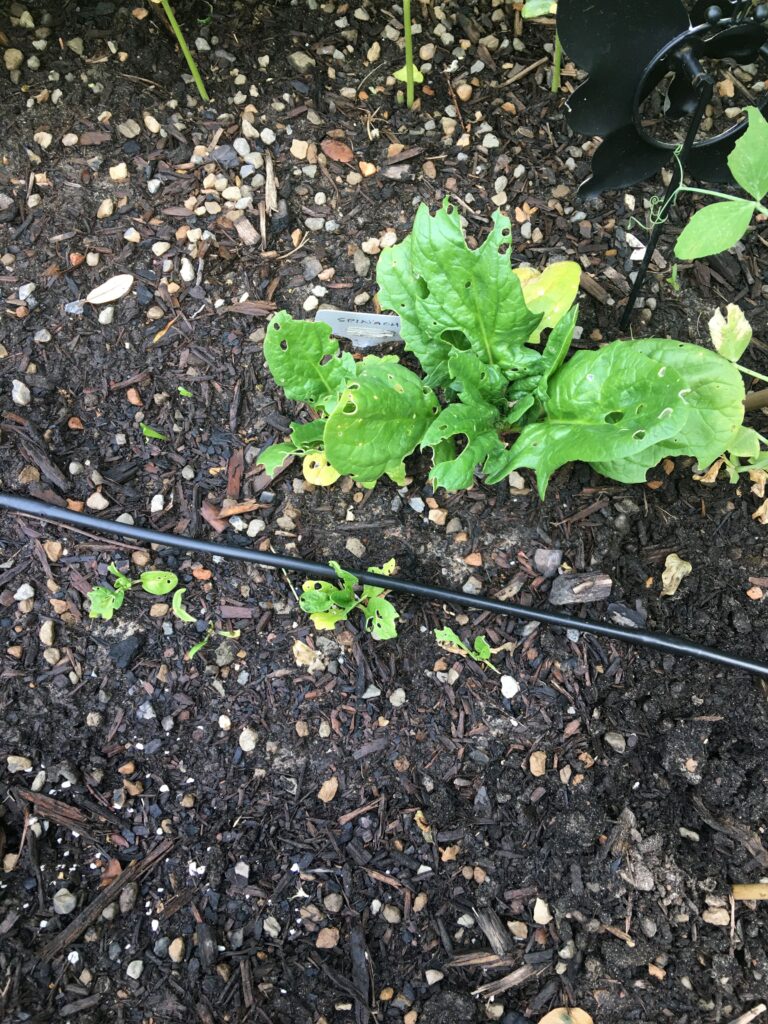
The other problem I’ve encountered is with spinach and green onion. I just haven’t seen any growth from the two at all. out in the garden. I direct-seeded the two back in early spring and only plug of spinach showed successful growth. The green onions never even left the seedling stage. Again you’ll see the spinach is being eaten by something, but only because I just kinda neglected it after awhile. The other seedlings never even got much bigger than what you see pictured.

The sad little spinach plants that we never really harvested.

I’m debating whether or not I want to start some spinach indoors and transplant them, although I’ve read they don’t transplant well, take 7 weeks to mature and don’t grow well in hot weather. Perhaps it’s too late? Maybe I’ll just replace it with another plot of sugar snap peas instead. Those have been successful and we know we like those a lot.

Still, having this garden is a sanity saver during this unusual time in our history. By sheer luck we started this project last December, but it’s become the most important thing in our daily lives–in my daily life mostly. Not only do we receive a meager nutritional return, but it does provide a sense of pride and accomplishment as well as some distraction when there are limited distractions available right now.

It’s also created a deeper connection between me and my mom, who, on every phone call, always asks how my garden is doing. Not only that, it’s awakened stories of her past about her parents, my dad, his parents and how they all were avid gardeners at some point in their lives. I find myself learning something new each time I talk to her.

I wonder if this pandemic never happened, and if I had still spent 50 hours a week away from the house, would I still have had the time and energy to dedicate to the garden’s success? Or would my enthusiasm for the project have faded off halfway through and shelved before anything came to fruition, much like other projects in the past? I don’t know. I would hope not.

Vegetable Garden Progress Week 9

What’s Growing On: Week 9

It’s been another 3 weeks since my last update. The weather has still been mostly cold and occasionally rainy. We’ve had some freezing temperatures some nights, and some days in the upper 60s. Like typical Texas, the weather has been all over the place.

Watering Schedule and Incorporating an Irrigation System

Last weekend, I checked on the status of the garden and I realized that my radishes are much smaller than they should be at about this time. In fact, according to the seed packet directions, they should be ready for harvest right about now. However, from what I can tell, they’re just now showing signs of their true leaves and their bulbs are still pretty weak and spindly. What gives?

After much research, I realized they’ve been under-watered.

I looked back through the precipitation records for my area at Wunderground and what I thought seemed like a weekly occurrence of rain for almost a month turned out to be an average of less than half an inch of rain per week. That was well below the recommended watering requirements for radishes. That’s when I realized I really needed to make watering an automatic thing.

I purchased a small garden irrigation kit from Dripworks last weekend. It shipped fast and literally arrived on my doorstep yesterday afternoon, so I’ve only opened the boxes and flipped through the catalog they included in the package, but at some point I’ll probably write a post about the setup.

Running Out of Indoor Growing Space

My indoor growing inventory has gone from a few seedlings here and there to a whole arsenal of plants including pollinator flowers. You can imagine how my limited indoor growing space has gone from manageable to completely out of control. All of my seed starts sit on a shelf in my office, but lately it’s expanded to another shelf with two auxiliary grow lamps propped up in whatever way I can get them to stay. My potting table is actually my craft desk. I can’t count how many times potting soil has ended up on the floor.

I’m starting to consider alternatives, like moving my seed starting to the garage. The only thing is the cats love to nose around out there as well. We also have limited electrical outlets and I’ll need one dedicated to grow lamps. Yet another project on the horizon.

What We’ve Harvested and What We’ve Planted

Because of the cold weather and my inconsistent watering, growth has been a little stunted. However, I have managed to harvest some lettuce for a lovely salad and kale for a mushroom pasta dish. I’m also harvesting herbs on a regular basis. Below is an egg dish that I made using chopped ham, a touch of yogurt, chopped mushrooms, and fresh herbs.

A bowl showing a mixture of egg, chopped ham, fresh herbs, and yogurt.
Baked egg with chopped herbs, ham, mushrooms, and yogurt.
Baked egg dish showing the crusty golden top.

Despite some of the challenges, I’m continuing to plant as scheduled. Here’s what’s sowed into the garden and indoors:

  • Nutri-red carrots
  • Green onions
  • Shallots
  • Sugar snap peas
  • Spinach
  • Golden wax bush beans
  • Tendergreen bush beans

What’s Growing On: Week 6

We’re entering week 6 of our first spring garden. If you want to go back to my previous update, Week 3, click here. Last weekend we finally finished filling up the raised garden bed. I marked out the grid with some twine and started planting some cold weather vegetables like lettuce, French Breakfast radish, and carrots. This weekend I also added spinach, green onions, shallots, and sugar snap peas.

We still have a lot of leftover soil, so we filled about 5 20-gallon fabric pots with some of it and transplanted some Lacinato kale and Premier kale. I’m not sure what’s going to go in the other pots at this point, but I like having the extra space.

Also several of my indoor seed starts are taking off. I’ve moved my eggplant and basil into larger pots. I set them out on the front porch to get a little late afternoon sun.

I have more than enough eggplant happening here so I’m giving one pot to my mom.
I also have a lot of basil going on here as well, but no one can ever have too much basil.

My pepper plants are also getting their second set of true leaves so they they’ll graduate into larger pots as well. Pretty soon I will need another location for a grow light setup to accommodate taller seedlings and young plants because as you can see in the photo below, some of my peppers are outgrowing the height of the current grow light, which is only setup for smaller seedlings.

Various peppers showing 4 weeks of growth.

I’m so pleased with how everything is coming along. The only thing that could ruin it right now is some freezing winter weather, like what they’re predicting this week.

Below freezing temperatures on Wednesday and wintry mix! Luckily I saw far ahead enough and was able to order this 10′ x 50′ package of garden fabric and some flexible garden hoops. I don’t have much to cover, but hopefully I won’t need to use all of it or any of it.

What’s Growing On: Week 3

It’s the third week of the new year. This 3-day weekend was desperately needed especially considering how stressful work has been lately. It wouldn’t be a time for R&R for me though. We had a truck load of limestone rock and and vegetable planting soil delivered Saturday morning so I knew there would be a lot of sweat and hard work in the days ahead.

As far as what I have growing in my indoor growing station, here’s a rundown:

Vegetables

  1. Lettuce Mixture
  2. Nadia Hybrid Eggplant
  3. California Wonder Pepper
  4. Goliath Pepper
  5. Red Cherry Pepper
  6. Garden Salsa Pepper
  7. Large Cayenne Pepper

Herbs

  1. Basil
  2. Cilantro
  3. Sage
  4. Parsley
  5. Thyme
  6. Chive (did not germinate, restarting)
  7. Oregano (poor germination, restarting)
  8. Lavender

Flowers

  1. Empress of India Nasturtiums
  2. Peach Melba Nasturtiums
  3. Johnny Jump-Ups
  4. Milkweed
  5. Echinacea

Yes, I have A LOT going on right now. In fact, many of them are already well into their first set of true leaves so I need to move them into larger pots. Luckily last week I placed a huge order of various nursery pots and I just bought a bag of perlite so I’m ready to do some transplanting.

Getting seedlings past the cotyledon stage is a little scary as this is the time when the seedling is still in the early stages of development and the most vulnerable to damping-off disease. I can’t tell you how much time I’ve spent inspecting all of my seedlings each morning and night these past few weeks to make sure each one of them are growing healthy and strong, free of mold and foreign growth.

My sage, still in its infant stages, but already developing it’s characteristic true leaves.

Now we’re entering the 6th week before the average last frost date. This weekend, along with filling the raised bed, I’m going to start tomatoes and potatoes. The kind of potatoes I bought are actually called “true seed” (Clancy Potatoes) in that they start as actual coated seed and not tubers.

A capsule of true potato seeds

Unlike tuber potatoes, true seed potatoes can be started indoors around the same time as tomatoes. Once they’re established, you can transplant them into the garden and grow them just like regular potatoes.

Next are tomatoes: Suncherry Xtra Sweet, Super Sweet 100, and Better Boy. I plan on putting those into starter pots this weekend as well.

I’m also going to move my lavender from cold storage onto a germination mat. I’ve learned to do a little bit of research for each seed I start because each one is different, especially lavender. Lavender seeds in particular need to undergo a process called cold wet stratification. This process replicates that of a cold winter and triggers the germination stage in the seed (watch this video for reference).

From what I’ve learned, the stratification time for lavender ranges between 30-40 days, but some have achieved success in just 3 weeks. I’m going to see if I can get to 3 weeks by using grow lights and a germination mat. Maybe I should start a backup batch just in case.

With all this new seed I’m starting, the stuff in progress above is going to need somewhere to go. That’s why I bought this 3′ x 3′ outdoor cold-frame storage. It arrived a few days ago but I haven’t assembled it yet, so I’m hoping to get to it this weekend as well. Daytime temperatures will start getting into the 60s this weekend which means this would be the perfect time to start hardening off some of these little seedlings.

Kitchen Garden Tales With The Adamses

Almost 4 years after moving into Craig’s tiny (big) house, my garden dreams are finally coming to fruition. We’re building raised garden beds!

Honestly I’ve never considered myself having much of a green thumb. Every plant I’ve ever tried to grow has died by my own hand, yet somehow I still want to keep on trying. Does that make me an unintentional serial killer?

Nevertheless, I’m super excited about the possibilities of growing our own fruits and vegetables and so is Craig.

The Garden Schematics

Our plan is to have 2 raised garden beds that are 9 by 5 feet in area which gives us a total of 90 square feet of growing space. That’s A LOT of room. Considering we can have 1 or more plants per square foot of growing space, that’s enough to feed a large family.

It’s not drawn to scale or anything like that, but I tried to draw it close enough to suggest measurements.

The two beds will sit on top of the cement fixture. The inside of the fixture is still pretty sunken, so I’m considering filling it with bulk drainage rock to make it level.

I don’t know whether or not we’ll build both in the same season. It’s definitely a lot of work to take on for two inexperienced gardeners. At this point I think we should just build one and get it going, learn from it, and then build the second one later this year. Hopefully by then we would have learned what to do from any mistakes we made with the first garden.

Picking Out the Location

We have a pretty large backyard that gets a good amount of sun during the day. The only thing is that the sunny part of the yard has this strange 10 foot by 13 foot pool structure that was filled in with dirt long before Craig moved in.

Ugh. What an eyesore. But look at the great sunlight it gets during the day!

Because it’s the perfect spot for a vegetable garden, demolishing it would be too expensive and too time consuming. Instead, we’re choosing to build two 9 foot by 5 foot raised garden beds on top of it. And because we really don’t want to utilize the growing medium inside of it (because who knows what kind of stuff is buried in there), we’re just going to grow on top of it.

According to the Square Foot Gardening Foundation, they recommend only a 6 inch depth of growing space for a raised garden bed, but if you want to grow root vegetables like carrots and potatoes, you’ll probably need at least 12 inches. Since we’re building on top of a giant bath tub essentially, we’re making it 20 inches both for the space as well as the height (to save our backs!).

Buying the Materials

So the weekend before Christmas we made a special trip to our local home improvement store and bought a significant load of lumber. We were concerned at first about being able to transport all of it home, but thanks to their cutting abilities, and our full sized sedan, we managed to fit all of it into our car and almost got the trunk closed. We had one 4 by 4 that was sticking out but other than that, we got everything else to fit!

If you think you need a gas guzzling, monster truck or SUV to haul a meager amount of lumber, think again! We got by just fine in our modest Toyota Camry.

There was one concern about cutting the 4 by 4. The store was only equipped to cut planks so we had to find a way to cut this one ourselves. I know my dad probably has one, but I didn’t really want to go on a hunt for a table saw or miter saw in their storage shed. We ended up bringing home a lightweight DeWalt Circular Saw.

The Finished Product

Well because we started this project right before the holidays (and also because we’re both pretty new at building things), it took us a few days spanned over a few weeks to finally complete the raised bed.

The idea is to level the pool structure underneath with drainage rock before layering in the bedding soil. I’m not sure yet if I want to put in a layer of landscape fabric first on top of the drainage rock before adding the soil, but considering the unevenness of the cement frame underneath, it will probably be a good idea especially to minimize erosion.

I’m relieved we’re finished with this phase though and I’m glad we only built 1 raised bed for now. This one was indeed a learning experience for us so hopefully the next one we build will be easier.

My seeds are still growing indoors so I’ll post some progress photos on that, but now I can’t wait to start planting!